How to Build a Control Circuit with Adjustable Working Time via Wi-Fi
Learn how to build a system that can turn DC loads on and off using a mobile application. You'll also learn how to perform this task via immediate actions or via timers set in advance.
In this article, you'll learn how to build a system that can turn DC loads on and off using a mobile application. You'll also learn how to perform this task via immediate actions or via timers set in advance for switching loads on and off.
Project Overview
You can implement this system in environments where you need to set your DC load for a specific time. This will allow you to use our Android application without any need for a hardware interface, keypad, and LCD screen.

Overview of the whole project.
Parts List
| Part | QTY |
|---|---|
| Arduino UNO or any compatible board | 1 |
| ESP8266 Wi-Fi module | 1 |
| USB TTL converter cable (optional) | 1 |
| Relay SPDT 12V | 2 |
| BC337 NPN BJT | 2 |
| BS170 MOSFET N Channel | 1 |
| 1K Ohm resistor | 2 |
| 10K Ohm resistor | 2 |
| 1N4007 diode | 2 |
| Screw terminals | 2 |
| LM317 adjustable voltage regulator | 1 |
| 0.1uF capacitor | 2 |
| Headers, female and male | - |
| Blank PCB board | 2 |
Setting Up Your ESP8266 Breakout Board
The ESP8266 is a low-cost SoC chip with an embedded microcontroller and full TCP/IP protocol stack, which means that it can directly access your Wi-Fi network.
Because this chip has its own MCU, you can put your application code within it or you can use the module just as a Wi-Fi transceiver— like what we are going to do in this project. It will be more efficient to use the same module as a transceiver and a controller, but just for learning purposes, we will communicate with the module using Arduino instead.
The ESP8266 chip comes in different modules. We will use the ESP-01 module. Of course, you can use any other module.
First, you must know that the module works on 3.3V, and the logic-high voltage from the Arduino should be the same to prevent causing damage to our module. This requires a voltage level converter between the Arduino (which works on 5V) and the module. The good news is that only the transfer pin of the Arduino will need this converter since the receive pin will usually recognize the 3.3V logic signals from the ESP8266
One of the simplest ways to do this conversion is to use a design from Sparkfun: You can order a ready-made module.

5V to 3.3V level converter
The following figure shows our ESP8266 pinout:

Image source: ESP8266 WiFi Module Quick Start Guide
| PIN | Function |
|---|---|
| UTXD | UART Transmit Data |
| URXD | UART Receive Data: Input should be 3.3V compatible |
| CH_PD | Power-down: Low input powers the chip down, high input powers it up; tie high for normal operation or the module will not function. |
| GPIO0 | At boot: Must be high to enter flash or normal boot; low enters special boot modes. |
| GPIO2 | At boot: Low causes bootloader to enter flash upload mode; high causes normal boot. |
| RST | Reset; active low |
| GND | Ground |
| VCC | Power/3.3V |
I used an LM317, an adjustable output voltage linear regulator with up to 1.5A output current, for providing a suitable 3.3V power supply for the module.
Note: Don’t use the 3.3V pin from the Arduino while the 3.3V voltage regulator used in Arduino can’t source the requested current for the module, especially for peak power consumption while transmitting.

ESP8266 breakout board diagram
I used the BS170 (instead of the BSS138) for the logic-level converter; both work fine.

ESP8266 breakout board
Now you can connect your module with your USB-TTL converter cable and try the module. For further details, I recommend reading some starters guides like ESP8266 WiFi Module Quick Start Guide.

USB-TTL converter cable
Setting Up Relay Breakout Board

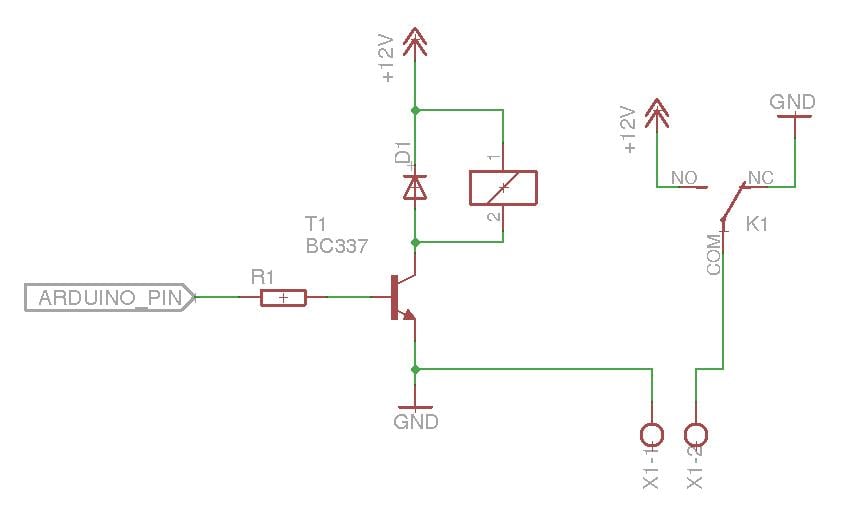
Relay breakout board diagram
I used a BC337 NPN BJT to control the coil of relay with a 1K Ohm base resistor. I also used the 1n4007 diode as protection from reverse voltage of the coil.
I chose to make the normally closed (NC) connection with ground. While off is the normal state for me, you can reverse the connection if you like.

Relay breakout board (top view)

Relay breakout board (bottom view)
Arduino Code
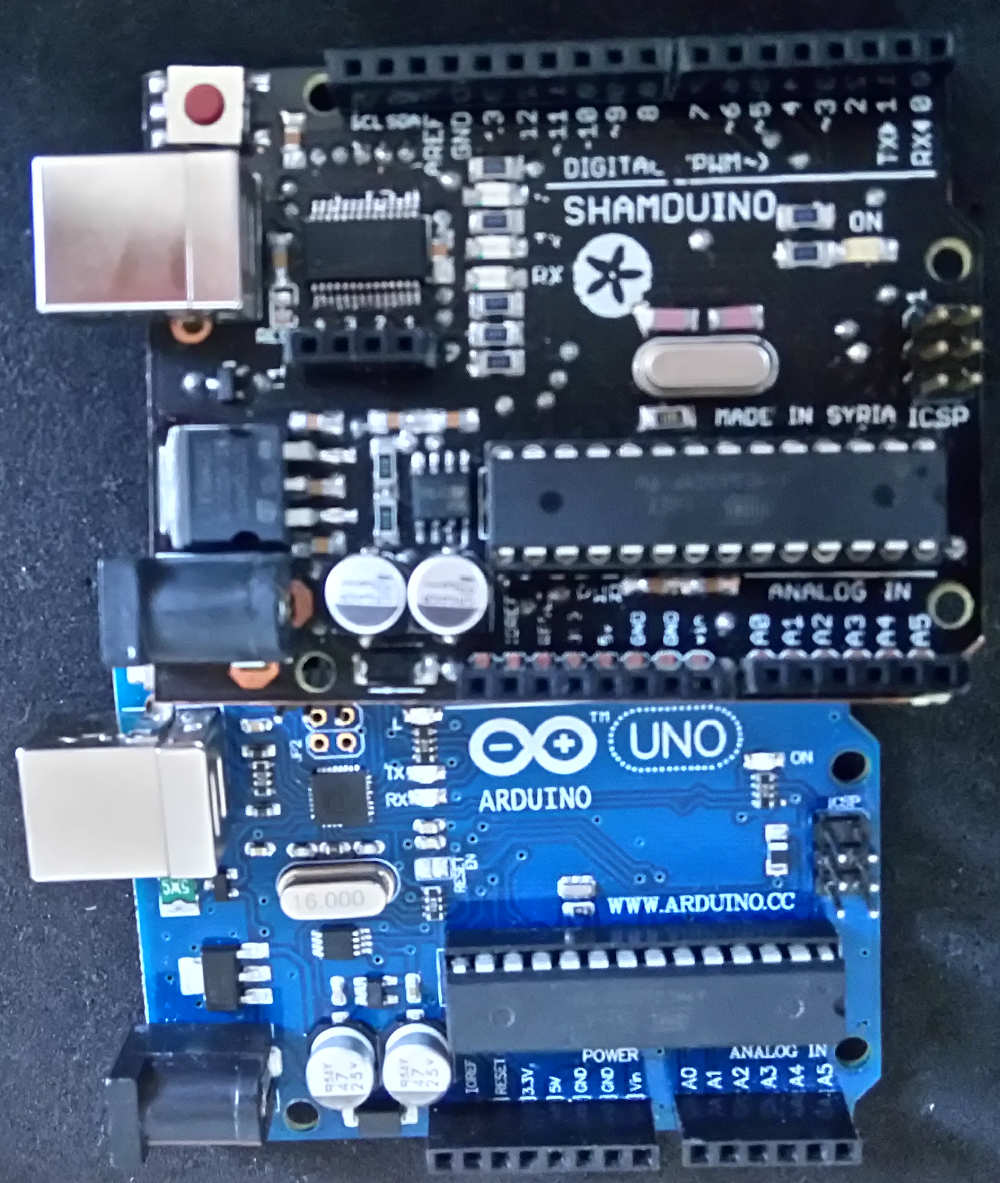
Now we face a problem. The ESP8266 uses UART as an interface for AT commands, and the Arduino UNO (which uses Atmega328) has only one UART port. That one port has already been connected to our USB-TTL bridge, also with pin 0 and pin 1.
As a solution, you can use an emulator for a UART port on another digital pin on the Arduino using AltSoftSerial or SoftwareSerial libraries. This will allow you to still have the hardware UART port for debugging and printing messages on the console, while the software port will be for communicating with the module.

A lot of people (including me) reported failure with software serial for high baud rates—like the one we will use with esp8266, 115200 baud. I can say that you will have 50% corrupted received data from the module if you used software serial and almost 100% correct transferred data from the Arduino to the module. I got these results after sniffing around on RX and TX lines.
As a solution, I added some "define" statements in the code to make things easier for you to choose between a software or hardware port. Be aware that you can’t use the same port for debugging and communicating with the module, so you need to choose between them.
//uncomment Serial.*** if you want to use HW serial port (PIN 0,1)

//uncomment esp8266.*** if you want to use SW serial port (PIN 2,3)

#define esp8266_Available() Serial.available() //esp8266.available()

#define esp8266_Find(ARG) Serial.find(ARG) //esp8266.find(ARG)

#define esp8266_Read() Serial.read() //esp8266.read()

#define esp8266_Write(ARG1,ARG2) Serial.write(ARG1,ARG2) //esp8266.write(ARG1,ARG2)

#define esp8266_Print(ARG) Serial.print(ARG) //esp8266.print(ARG)
In the code, you will find the part that sets up the module to connect to your router.
sendCommand("AT+RST\r\n", 2000, DEBUG); // reset module

sendCommand("AT+CWMODE=1\r\n", 1000, DEBUG); // configure as access point

sendCommand("AT+CWJAP=\"tur\",\"341983#tur\"\r\n", 3000, DEBUG); //**** CHANGE SSID and PASSWORD ACCORDING TO YOUR NETWORK ******//

delay(10000);

sendCommand("AT+CIFSR\r\n", 1000, DEBUG); // get ip address

sendCommand("AT+CIPMUX=1\r\n", 1000, DEBUG); // configure for multiple connections

sendCommand("AT+CIPSERVER=1,1337\r\n", 1000, DEBUG); // turn on server on port 1337
The Sketch loop waits for a command to come over Wi-Fi connection. The currently supported commands are:
- ‘con’ to respond tostatus of outputs, low or high.
- ‘on=’ turn the corresponding pin on.
- ‘of=’ turn the corresponding pin off.
- ‘Tm=n/fS’ set on(n)/off(f) timer for the corresponding pin.
All previous commands have an acknowledge response.
Notes:
- Some parts of this Sketch is based on an AllAboutEE tutorial.
- If you use modules with an old SDK, you may suffer from bugs like I did. The only solution in this case is to update your firmware to the latest version. Check this AAC article out for assistance with updating the firmware. I upgraded my firmware from version 1.3 to 1.5.4.
Arduino_with_ESP8266_Controller.zip
Android Application
To control all of the above hardware components, we will use a simple Android application. This application will allow us to turn the output on or off directly or after a specific period of time.
Arduino_with_ESP8266_Controller_app.zip
Note: This application requires Android 4.0 (IceCreamSandwich) and up.
- First of all, you have to know the IP address of your module. If you used the software serial port the IP will be printed on console if you used hardware port you must use serial cable to sniff on RX,TX lines and see the IP address. You'll also need to know the Port Number as you put it in the sketch. After that, press "connect" to get the status of all three inputs. You'll need to make sure that your Wi-Fi is on and you are connected to your local network.
- Now press any switch you want to turn it ON/OFF. Whenever you want, you can click "refresh" to refresh the status of all outputs.
- In the "Timers" tab you can set any of these three outputs to turn ON/OFF after a specific period of time (between 0 and 24 hours).
- After any process, you will receive a confirmation message telling you whether the process completed successfully or you have an error.
Thanks to my friend Jihad Al-Bathish who developed the Android app for this project.
Give this project a try for yourself! Get the BOM.


nice project
Does it work if I use a raspberry Pi instead of arduino ?