 Facebook
 Google
 GitHub
 Linkedin
Language Control Structures: Keep Your Arduino Under Control
Make your Arduino programs more flexible by learning how to use the Arduino language control structures.
Make your Arduino programs more flexible by learning how to use the Arduino language control structures.
A programming language's control structures allow you to take action based on certain conditions. The Arduino control structures are very similar to the control structure of the C language and include:
In this tutorial, we will discuss the most commonly-used control structures:
- for loop
- switch statement
- if-else
- while loop
Conditional Statements
If statements and while statements are called conditional statements. They evaluate a particular condition, and execute a series of statements in brackets if the condition is true{ }. Here's an example:
if (pin_b == LOW) { digitalWrite(ledPin, HIGH);// This tells the LED to turn on }
The if statement consists of the word "if" followed by a condition in parentheses. If the condition is true, then the statements between the brackets that follow will be executed. In this case, if the digital value of pin_b is LOW, then the program will set the value of ledPin to HIGH. The statements between the brackets are executed only once.
The while loop is similar to the if statement, but in this case, the statements between the brackets are executed over and over until the condition becomes false. Here's an example:
while (pin_0 == LOW) {

 digitalWrite(ledPin, HIGH);

 delay(100);

 digitalWrite(ledPin, LOW);

 delay(100);

 switchValue = digitalRead(pin_0); // This stores a new value into the variable switchValue

 }
In this example, the program will toggle the state the LED (i.e. blink) until a user presses a switch causing the digital value at pin_0 to go HIGH.
Experiment 1: FOR Loop
In this experiment, we demonstrate how to use a ‘for loop’ to change the brightness of an LED.
Hardware Required
- 1 x Arduino Mega2560
- 1 x breadboard
- 1 x LED
- 1 X 220 ohm resistor
- 2 x jumper wires
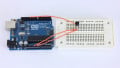
Wiring Diagram

In this simple circuit, an LED is connected to pin 2 of the Arduino. To change the brightness of the LED, we change the duty cycle of the pulse width modulated (PWM) signal output at pin 2. The program uses a for loop to fist go from dim to bright and a second to go from bright to dim.
Code: Changing Brightness Using For Loop
// changing brightness using for loop
const int pwm = 8 ;
int i ;

void setup()
{
      pinMode(pwm,OUTPUT);
}
void loop()
{

/*
FOR LOOP SYNTAX
for(initialization ; condition ; increment)
{
CODE
}
*/

   for(i=0 ; i < 256 ; i++ )
   {
       analogWrite(pwm,i)  ; 		 // for loop from low to High
       delay(10);
   }

   for(i=255 ; i > 0 ; i-- )
   {
       analogWrite(pwm,i)  ;  		// for loop from high to low
       delay(10);
   }

}Experiment 2: Conditional Statements
In this experiment, we will turn on or off two LEDs depending on the contents of a message sent serially to the Arduino. The program uses the following control structures:
- Switch Statement
- If-else if- else
- While Loop
Hardware Required
- 1 x Arduino Mega2560
- 1 x breadboard
- 2 x LEDs
- 2 X 220 ohm resistor
- 3 x jumper wires
Wiring Diagram
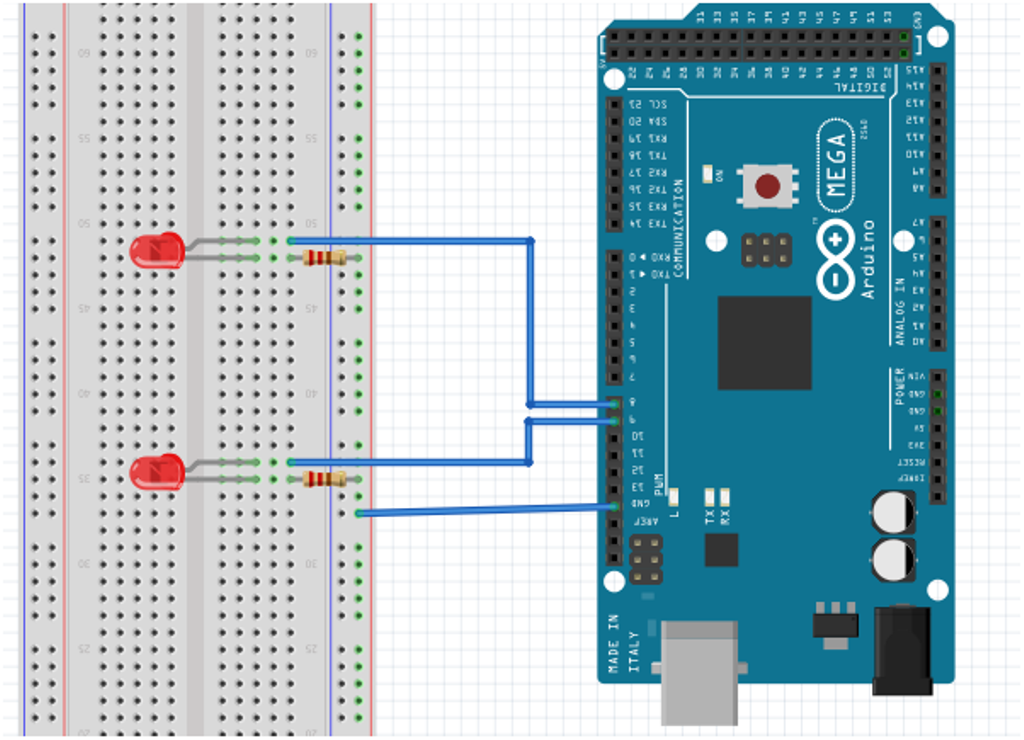
The two LEDs are connected to two Arduino output pins, and the Arduino turns them on or off using conditional statements. There are four different states:
- If the serial data == 1, only the green LED will turn on.
- If the serial data ==2, only the yellow LED will turn on.
- If the serial data==3, both LEDs will turn on.
- If the serial data equals any other value, LEDs will turn off.
Code 1: Switch Statement
// Use of Switch Structure
   const int green  = 8;
   const int yellow = 9;

   char i;
   void setup()
   {
        pinMode(green  , OUTPUT);   		//setting pins output
        pinMode(yellow , OUTPUT);
        Serial.begin(9600);
   }
   void loop()
   {
        i = Serial.read(); 			 // To serially send data to switch statements
        Serial.println(i);
        delay(50) ;

        switch(i)  				 //Typical switch structure
        {
              case '1':   				//Condition for Green LED
              digitalWrite(green,HIGH);
              digitalWrite(yellow,LOW);
              delay(350);
              break;

              case '2':  				//Condition for Yellow LED
              digitalWrite(green,LOW);
              digitalWrite(yellow,HIGH);
              delay(350);
              break;

              case '3':  				//Condition for Both LED
              digitalWrite(green,HIGH);
              digitalWrite(yellow,HIGH);
              delay(350);
              break;

              default:   					//Leds are off
              digitalWrite(green,LOW);
              digitalWrite(yellow,LOW);
              break;
       }

}Code 2: Using If-Else Statements
// Use of If - else statements
   const int green  = 8;
   const int yellow = 9;

   char i ;
   void setup()
   {
        pinMode(green  , OUTPUT);   			//setting pins output
        pinMode(yellow , OUTPUT);
        Serial.begin(9600) ;
   }
   void loop()
   {
        i = Serial.read();  				// To serially send data to switch statements
        Serial.println(i);
        delay(50);

        if(i=='1')
        {
             digitalWrite(green,HIGH);
             digitalWrite(yellow,LOW);
             delay(350);
        }

        else if(i=='2')
        {
             digitalWrite(green,LOW);
             digitalWrite(yellow,HIGH);
             delay(350);
        }

        else if(i=='3')
        {
             digitalWrite(green,HIGH);
             digitalWrite(yellow,HIGH);
             delay(350);
        }

        else
        {
             digitalWrite(green,LOW) ;
             digitalWrite(yellow,LOW) ;
        }

}Code 3: Using while Loops
// Use of while Loop
   const int green  = 8 ;
   const int yellow = 9 ;

   char i ;
   void setup()
   {
   pinMode(green  , OUTPUT) ;		   //setting pins output
   pinMode(yellow , OUTPUT) ;
   Serial.begin(9600) ;
   }

   void loop()
   {

    i = Serial.read() ;		  // To serially send data to switch statements
    Serial.println(i) ;
    delay(50) ;

    digitalWrite(green,LOW) ;
    digitalWrite(yellow,LOW) ;

    while(i=='1')
    {
    digitalWrite(green,HIGH) ;
    digitalWrite(yellow,LOW) ;
    i = Serial.read() ;
    Serial.println(i) ;
    delay(350) ;
    }

    while(i=='2')
    {
    digitalWrite(green,LOW) ;
    digitalWrite(yellow,HIGH) ;
    i = Serial.read() ;
    Serial.println(i) ;
    delay(350) ;
    }

    while(i=='3')
   {
    digitalWrite(green,HIGH) ;
    digitalWrite(yellow,HIGH) ;
    i = Serial.read() ;
    Serial.println(i) ;
    delay(350) ;
   }

}Videos
Give this project a try for yourself! Get the BOM.


Just buy the K&R book and read it, paying particular attention to the style of coding that they use. It is The Bible with respect to ‘C’ programming. The above code does not conform to the K&R style though.