 Facebook
 Google
 GitHub
 Linkedin
Build a Motion Activated “Santa Cam”
This is a simple motion activated camera that will allow you to finally get photographic evidence of Santa Claus.
Nab the jolly man!
Every year Santa slides down the chimney, leaves presents, consumes the milk and cookies and disappears without a trace. For most believers in Santa Claus, the sudden appearance of presents and the disappearance of the milk and cookies is proof enough, but there are some out there who insist on hard evidence. To satisfy these doubters, I have designed a simple motion activated camera rig that will capture pictures of Santa in action and prove once and for all that Santa is, in fact, real.
Materials:
Camera (with an external shutter switch)
Arduino Microcontroller
PIR Motion Sensor Module
Diode
Jumper Wires
Breadboard

.JPG)

Connecting to the Camera's Shutter Switch Terminals
Many cameras are able to connect to an external shutter switch. For instance, my Canon Rebel can connect to an external shutter switch with a 2.5mm stereo plug. The barrel of the plug connects to ground on the camera. The center ring connects to the focus function. The end contact controls the shutter. These functions are activated by connecting the contacts to the ground contact. Different camera models may use different connectors and activate the functions differently. So consult your camera's manual to be sure that you know how everything works.


Connecting the Camera's Shutter Switch to the Arduino
We will be controlling the camera with an Arduino microcontroller. To do this we need to connect the ground pin on the camera's remote shutter switch to the GND pin on the Arduino with a jumper wire. This will give the two devices a common reference ground.
Then we need to connect the shutter contact on the camera to one of the digital pins on the Arduino with a diode. The cathode of the diode should be connected to the digital pin on the Arduino and the anode of the diode should be connected to the shutter contact of the camera. With the diode in this configuration, the Arduino will be able to activate the shutter when the digital pin sends out a LOW signal but when the Arduino sends out a HIGH signal, the diode will block it and protect the circuits in the camera.
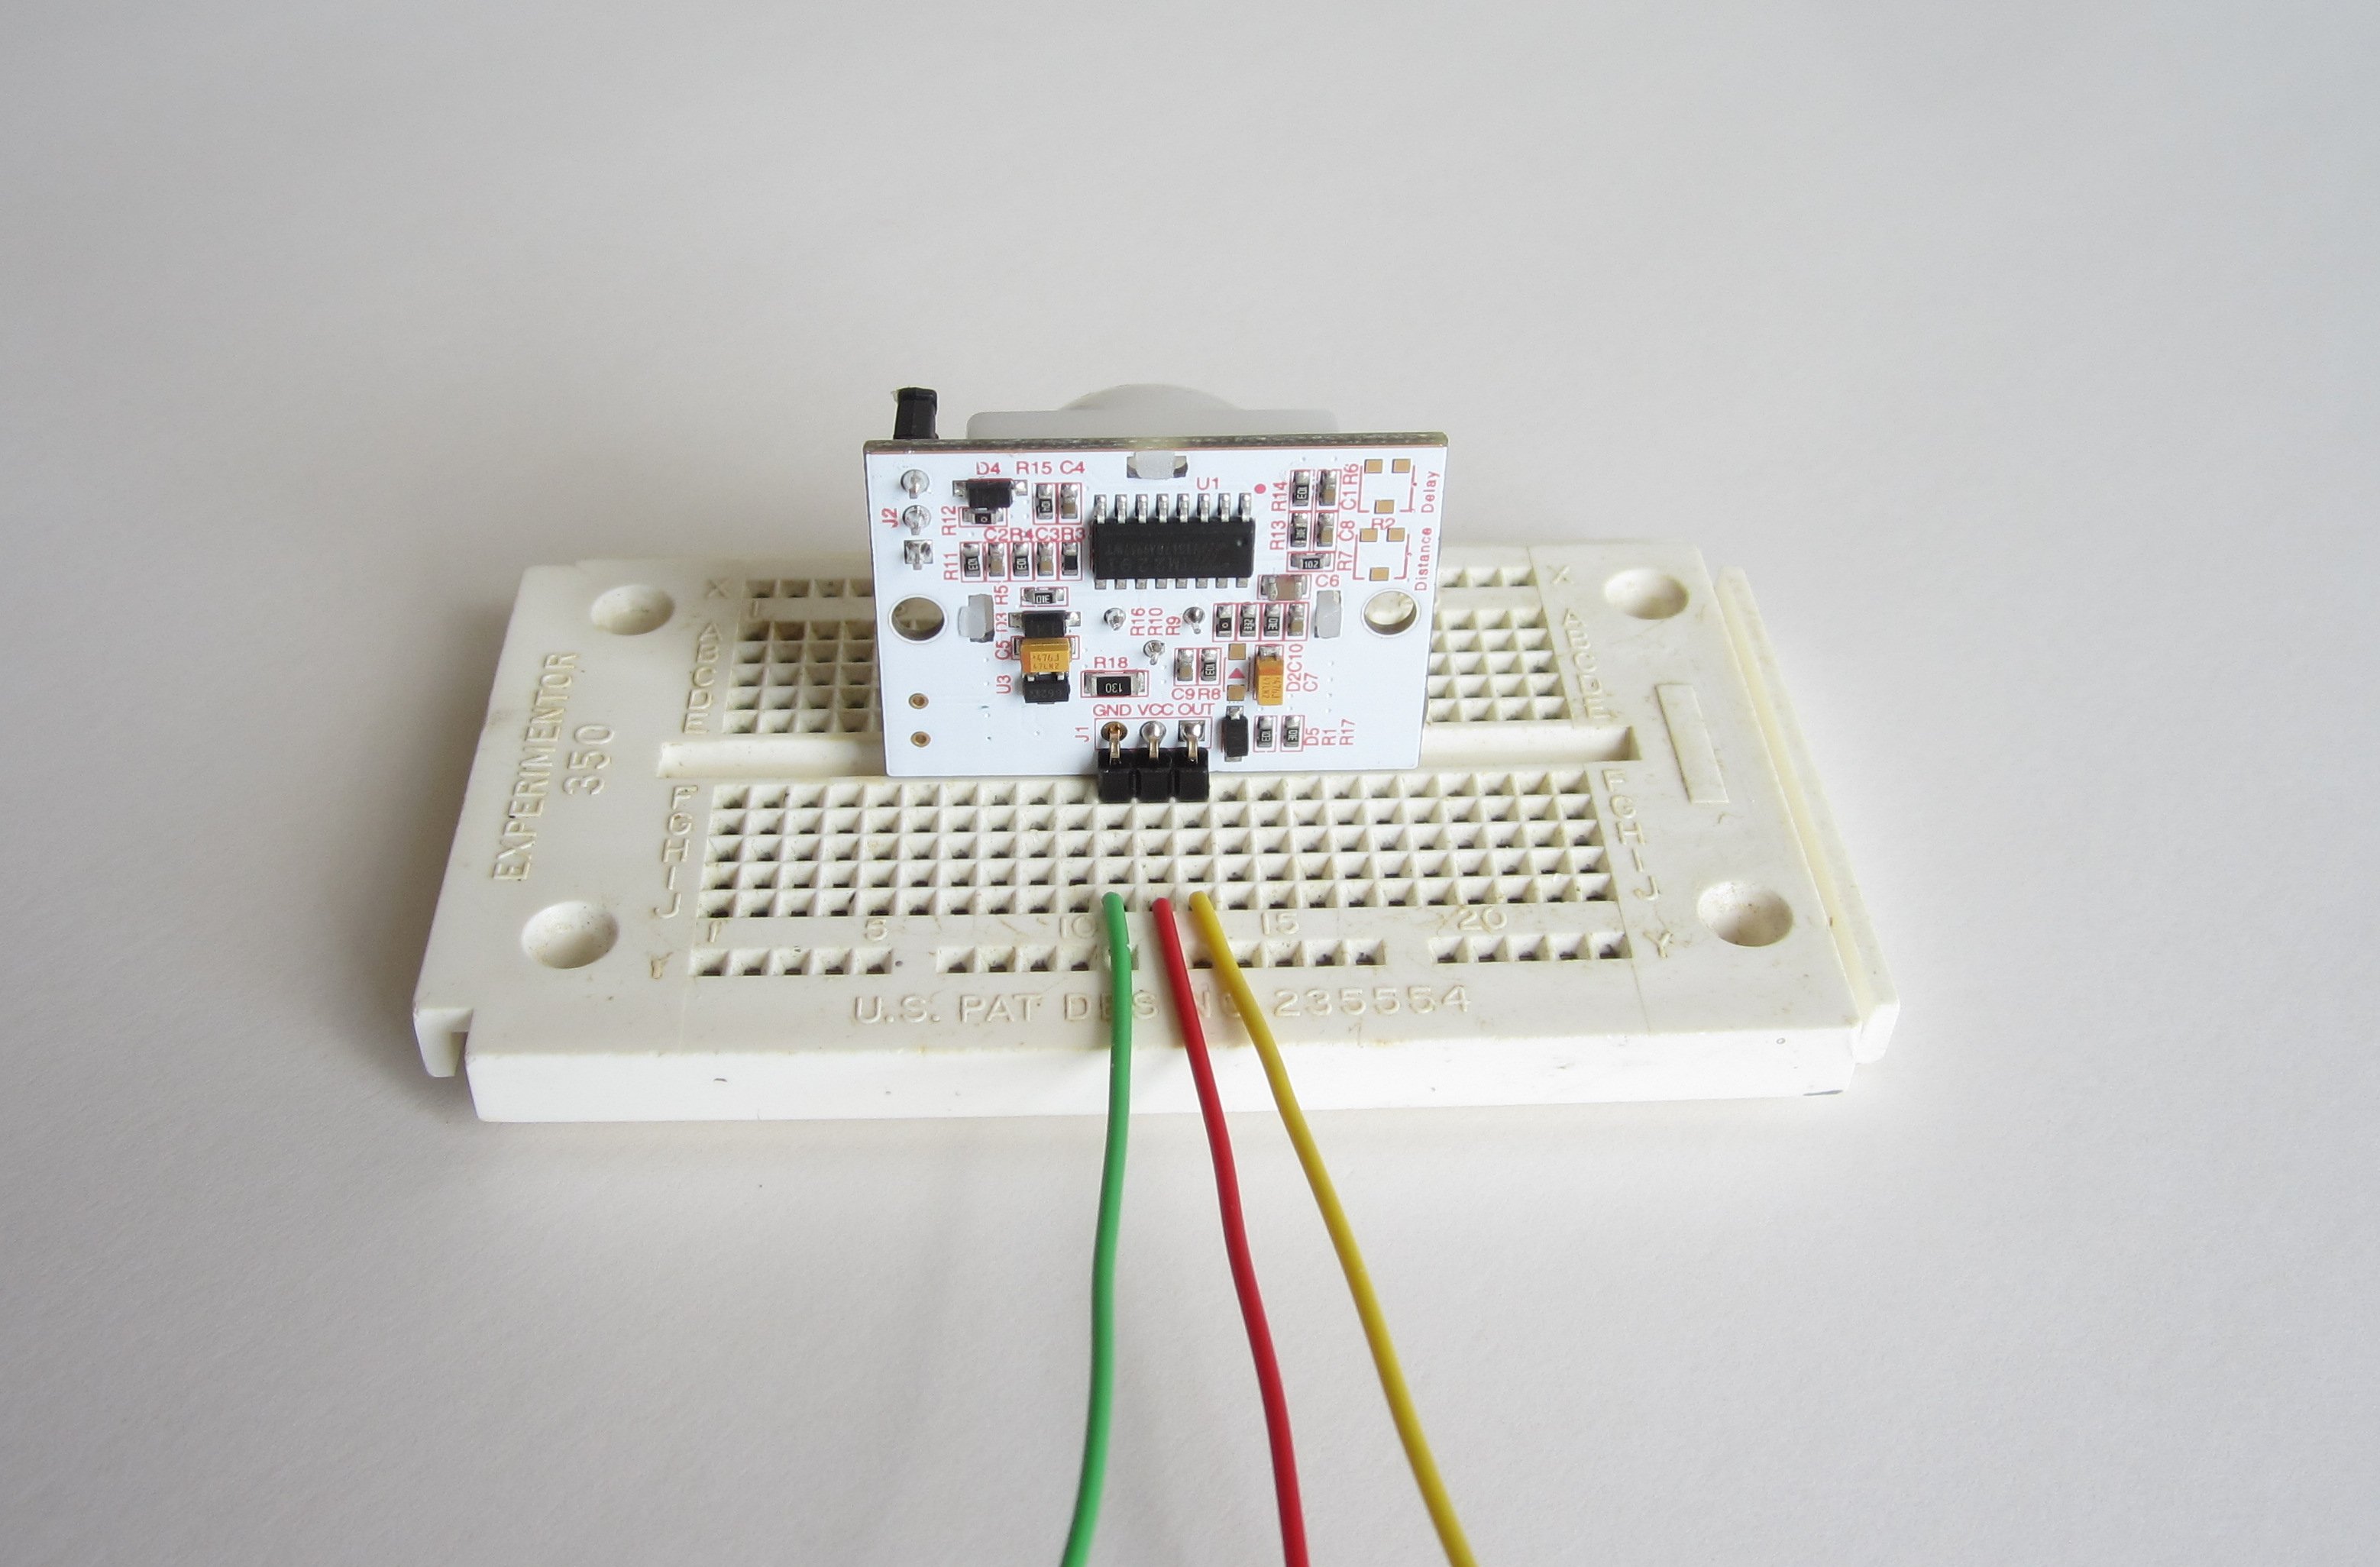
Connecting the Motion Sensor to the Arduino
To detect when someone is in front of the camera, I am using a passive infrared (PIR) motion sensor. This module has three pins. The GND pin on the module connects to the GND pin on the Arduino. The Vcc pin on the module connects to the 5V pin on the Arduino. The OUT pin on the module connects to one of the digital pins on the Arduino. When the sensor detects motion, it sends a HIGH signal to the digital pin that can be read with a digitalRead function.
The Arduino Code
The code for this project is really simple. The Arduino uses the digitalRead function on pin 10 to monitor the output of the motion sensor. If a HIGH signal is detected (motion is present), then the digital pin that is connected to the shutter (pin 6) is set LOW. This activates the shutter function on the camera. There is a short delay to allow for the camera to focus and take the picture. Then digital pin 6 is set HIGH again to reset the shutter on the camera.
Here is a simple example code that you could use:
int shutterPin = 10;     // shutter contact connected to digital pin 10
int sensorPin = 7;     // motion sensor connected to digital pin 6
int val = 0;     // variable to store the read value

void setup()
{
  pinMode(shutterPin, OUTPUT);     // sets the digital pin 13 as output
  pinMode(sensorPin, INPUT);     // sets the digital pin 7 as input
}

void loop()
{
  val = digitalRead(sensorPin);     // read the signal from the motion sensor
  if(val == HIGH)
  {
    digitalWrite(shutterPin, LOW);     // sets the shutter pin LOW to activate the shutter
    delay(3000);     //delay for camera to focus and take picture
    digitalWrite(shutterPin, HIGH);     // sets the shutter pin HIGH to de-activate the shutter
   }
}
Motion_Activates_Santa_Cam.zip
Hide the Motion Sensor and the Camera
You don't want Santa to see your sensor or your camera, so hide the motion sensor in some nearby Christmas decorations. Then hide the camera some place out of sight such as behind a large piece of furniture.

Set out Milk and Cookies as Bait
It is a well known fact that Santa can't resist a plate of freshly baked cookies and a glass of cold milk, so this would make the perfect bait for our trap. Be sure to set up the milk and cookies out in the open between the chimney and the Christmas tree. Make sure that the motion sensor can detect when someone is standing next to it.

Go To Bed and Wait
After testing out your system to make sure that everything is working properly, your trap is ready. You can now go to bed confident that when you wake up in the morning you will finally have definitive proof of Santa (or whoever it is that eats those cookies).

Give this project a try for yourself! Get the BOM.


can you provide an electrical connections diagram ? . i have a nikon D 90 camera which uses a remote shutter which also has the 3 wires - ground , auto focus and shutter . assume the same sketch can be used