 Facebook
 Google
 GitHub
 Linkedin
Read and Write on NFC Tags with an Arduino
Learn to use an Arduino to read NFC tags and write information on them! Near field communication protocols are what electronic devices can use to communicate and transfer data between each other.
Use an Arduino to read NFC tags and write information on them!
What's NFC?
Near field communication are protocols that electronic devices use to communicate and transfer data between each other. Near field communication devices have to be very near to each other, usually between 10cm, but the range can vary depending on the device that is transmitting and the size of the tag. NFC tags require no power input whatsoever. They use magnetic induction between two between two small loop antennas. The tags these days carry between 96 and 4,096 bytes of information.
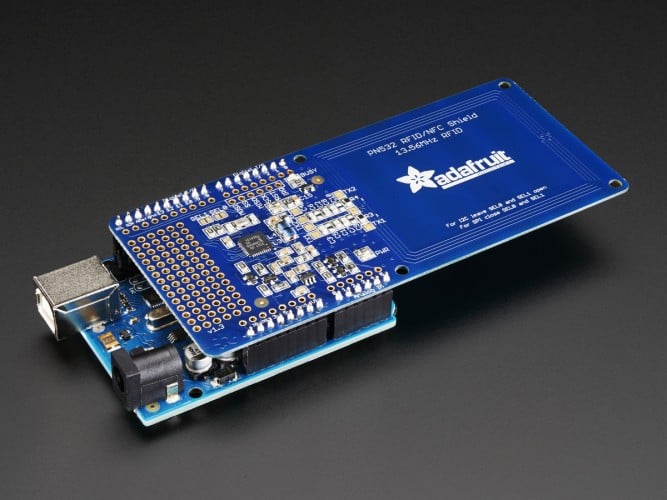
Parts List
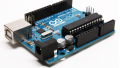
- Arduino Uno R3
- Adafruit PN532 RFID/NFC Shield
- Arduino IDE (Integrated Development Environment)
- Rewritable NFC Tags
It is important that the NFC Tags are rewritable, otherwise this won't work.
To test whether what we wrote on the tags was successful, we can test with the Arduino or with an NFC-enabled phone. Most smartphones running Android should be able to read NFC tags, and I will be testing with a Nexus 5. Unfortunately for iPhone users, the only iPhones that supports NFC are the iPhone 6 and the 6s, but they do not support NFC tag reading so just use the Arduino to test out what your tag has written on them. iPhones only use their NFC capability for apple pay, therefore you cannot use them to read tags or anything else.
Once we have all the parts together, we need to install two libraries that will make the reading and writing on tags possible. The libraries are don/NDEF and Seeedstudio’s, the one we will be mainly using is don’s since Seeedstudio’s library is used if you have the Seeedstudio NFC shield. We will install it as a library just in case. You have to download and install both libraries using Arduino’s “Add .zip Library” under Sketch >> Include Library. Make sure to install both libraries separately and under the default Arduino directory otherwise you will have compiling errors.
Start the IDE and you should have a new sketch file. Save your new file under any name that you chose, like “Read NFC Tag.” The first files that you will have will be the header files and they will be the following. They will go before the void setup().
#include
#include
#include    // The following files are included in the libraries Installed
#include

PN532_I2C pn532_i2c(Wire);
NfcAdapter nfc = NfcAdapter(pn532_i2c);  // Indicates the Shield you are using
Reading an NFC Tag
These header files are extremely important and the project won’t work without them. Afterwards you want to write the following code.
void setup(void) {
  Serial.begin(9600);
  Serial.println("NFC TAG READER"); // Header used when using the serial monitor
  nfc.begin();
}

void loop(void) {
  Serial.println("\nScan your NFC tag on the NFC Shield\n");  // Command so that you an others will know what to do

  if (nfc.tagPresent())
  {
    NfcTag tag = nfc.read();
    Serial.println(tag.getTagType());
    Serial.print("UID: ");Serial.println(tag.getUidString()); // Retrieves the Unique Identification from your tag

    if (tag.hasNdefMessage()) // If your tag has a message
    {

      NdefMessage message = tag.getNdefMessage();
      Serial.print("\nThis Message in this Tag is ");
      Serial.print(message.getRecordCount());
      Serial.print(" NFC Tag Record");
      if (message.getRecordCount() != 1) {
        Serial.print("s");
      }
      Serial.println(".");

      // If you have more than 1 Message then it wil cycle through them
      int recordCount = message.getRecordCount();
      for (int i = 0; i < recordCount; i++)
      {
        Serial.print("\nNDEF Record ");Serial.println(i+1);
        NdefRecord record = message.getRecord(i);

        int payloadLength = record.getPayloadLength();
        byte payload[payloadLength];
        record.getPayload(payload);


        String payloadAsString = ""; // Processes the message as a string vs as a HEX value
        for (int c = 0; c < payloadLength; c++) {
          payloadAsString += (char)payload[c];
        }
        Serial.print("  Information (as String): ");
        Serial.println(payloadAsString);


        String uid = record.getId();
        if (uid != "") {
          Serial.print("  ID: ");Serial.println(uid); // Prints the Unique Identification of the NFC Tag
        }
      }
    }
  }
  delay(10000);
}
Once you have saved and uploaded this code unto your Arduino with the shield attached, you can begin testing what messages your tags have, if any. When you upload the program to the Arduino, open the Serial monitor and you should see a message saying “NFC TAG Reader,” and below it instructions telling you to “Scan your NFC tag on your NFC Shield.” When I do that I get this on my serial monitor:

Notice that it gives the the unique identification of the NFC tag and it tells me what information I have written on the tags. On this particular tag I have a simple welcome message and a link to the Arduino Twitter. The Arduino is successfully reading the info on my tag. The video below shows how my Nexus 5 reads the tag and displays the messages.
Writing on an NFC Tag
Now to be able to write a message on a tag, the process is similar except we are going to change the code a little bit. The header before void setup() will stay the same but this will be the code you want to write and upload to the Arduino.
void setup() {
    Serial.begin(9600);
    Serial.println("NFC Tag Writer"); // Serial Monitor Message
    nfc.begin();
}

void loop() {
    Serial.println("\nPlace an NFC Tag that you want to Record these Messages on!"); // Command for the Serial Monitor
    if (nfc.tagPresent()) {
        NdefMessage message = NdefMessage();
        message.addTextRecord("My First NFC Tag Write"); // Text Message you want to Record
        message.addUriRecord("http://allaboutcircuits.com"); // Website you want to Record
        message.addTextRecord("Way to Go, It Worked!");  // Ednding Message for you to Record
        boolean success = nfc.write(message);
        if (success) {
            Serial.println("Good Job, now read it with your phone!"); // if it works you will see this message
        } else {
            Serial.println("Write failed"); // If the the rewrite failed you will see this message
        }
    }
    delay(10000);
}
This Code is Saving three messages on the tag: an intro text saying “My First NFC Tag Write”, then a link to AllAboutCircuits and lastly an ending message saying “Way to Go, It Worked!”

When I scan the tag on my phone, I now get the two messages and the link. You can change the code to say whatever you want on the messages and to direct you to another link. When making any changes make sure you check the tag info with the Arduino or a smartphone. Have fun working with NFC!
Give this project a try for yourself! Get the BOM.


How can I give a tag, a password of something like that with the pn 532
I want to use it in a public place and I don’t want that people can change the infornation on the nfc tag with the app npx for example.
I hope someone can help me