Facebook
 Google
 GitHub
 Linkedin
Teardown Tuesday: IoT Garage Door Opener
In this week’s Teardown Tuesday we are going to take a look at an accessory that will allow you to connect your garage door opener to the internet, the Garageio!
Want to see inside an IoT garage opener?
We live in a connected world! Smoke detectors, thermostats, and coffee makers are becoming more and more connected! In this week’s Teardown Tuesday, we're going to take a look at an accessory that will allow you to connect your garage door opener to the internet, the Garageio! In this extended edition of Teardown Tuesday there background and installation information on this unique product.
Overview
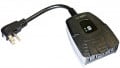
The Garageio is a small box that interfaces to your garage door opener and connects to a WiFi network. Through Garageio’s app, you can control your garage from anywhere with an internet connection from a smartphone. Three of the key features of the Garageio is its simplicity, ability to relay status, and the extra security it provides.

A Garageio installed on a Garage Door Opener. Image from Garageio
Simplicity
Sometimes the best things in life are those that just work! Garageio is designed with simplicity in mind. The installation of the Garageio is designed to be very simple and straightforward. The Garageio’s app follows suit and features a very minimalist design, with just a garage door that is swiped up and down.

Garageio's Mobile App
Status
Ever wonder if you left the garage door open? The Garageio app has the ability to display the current status of the door regardless if it was opened with the app or not! Also, if the garage door is left open for more than 30 minutes, the app will display an alert.
Security
Garageio allows the owner to share control of the garage door with anyone and revoke it. With Garageio, there's no more worrying about who knows the passcode to the garage’s keypad.
Installation
One of the objectives of the development of this product was to keep it simple. They met that objective with the installation. The only tools needed during the installation process are a step ladder and a screwdriver
WiFi
Connecting the Garageio to a WiFi network is straightforward. Download the Garageio app from the Google Play Store or the Apple App Store. In the app, you need to enter the Garageio serial number, the WiFi username, and WiFi password. The Garageio app then prompts you to hold the smartphone up to the sensor on the Garageio. The phone’s display will flash for several seconds. If programming was successful a green light will be displayed on the Garageio. All done!

The BlinkUp interface in action from Garageio
Connecting to the Opener
Connecting the Garageio to your garage door opener is pretty straight forward. The Garageio emulates the wall mounted button that most garage door systems contain. To attach the Garageio, simply connect two wires per the diagram provided by Garageio for your model opener.

Just connect the black and red wire to the appropriate locations!
Door Sensor
The Garageio uses a reed switch to determine if the garage door is open or closed. Mounting the reed switch and magnet are achieved via adhesive strips on the rear of them. The magnet needs to be within about an inch of the sensor to properly work.
.jpg)
The Door Status Sensor installed.
Teardown
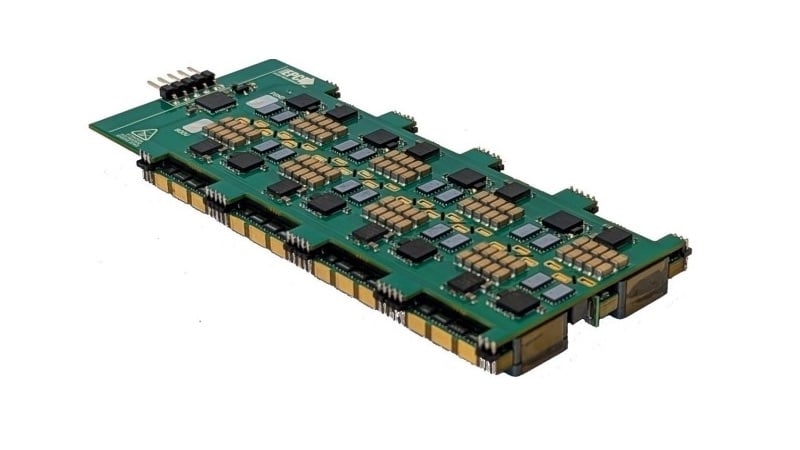
A Teardown Tuesday wouldn't be complete without a teardown! We're going to look at the major sections of the Garageio; the power supply, the wireless module, and the output relays. A quick note, the serial number and mac address were intentionally removed for this article.
.jpg)
All of the electronics inside the Garageio
WiFi Module
The heart of the Garageio is it’s WiFi module! Not only does the module handle the WiFi connectivity, it also acts like a microcontroller. The Garageio uses an Electric IMP IMP002 module to achieve this.
.jpg)
The Electric Imp WiFi Module
The Electric Imp is a premade WiFi module that's designed to speed up the development time for IOT products. The Electric Imp provides many benefits to new product developers such as libraries, OTA software updates, security features, cloud services, and a handful of built-in features. The Electric Imp isn’t the only player in this field, another option is Particle that manufactures a WiFi and Cellular Option.

The Electric Imp Platform
Power Supply
The Garageio receives 5v from its included wall-mounted power supply. The 5v rail is used to power the transistor array and relay coils. The 5v also powers a TI LP38690 linear voltage regulator to provide the 3.3v to the Electric Imp.
.jpg)
The 3.3v Linear Power Supply
Relays
To emulate the commands that the garage door opener receives from the interior push button, it uses a relay to produces a similar signal. The Garageio can control up to3 garage door openers. The Garageio employs 3 Omron Electronics G5LE-14 relays with a 5v coil voltage.
.jpg)
The relays that the Garageio uses
Electric Imp’s IO pins are only rated for 8mA, making them unable to drive the relay coils that require 78mA. To control the relays, a TI ULN2003A transistor array is used. The ULN2003A has built-in flyback diodes so external diodes are not required.
.jpg)
The transistor array to control the relays
Wrapping it Up!
Every aspect of the Garageio is simple; the hardware, software, and setup. With devices becoming smarter and smarter, simplicity is becoming a rarity! Technology should not add complexity to your life, it should enhance it, this is something that the Garageio achieves. A big thank you to Garageio for lending a unit and making this Teardown possible!
Thanks for looking at this week's Teardown Tuesday.
Stop by next Tuesday for another teardown! We're always looking for new things to teardown, if you have any suggestions or would like to contribute an item for a future Teardown Tuesday click here for my email address.
Next Teardown: What's Inside a Bluetooth Speaker?