Facebook
 Google
 GitHub
 Linkedin
Teardown Tuesday: Smart Doorbell and Camera System
In this teardown, we open up the Ding Home Package, by zmodo, to see what we can find.
In this teardown, we open up a smart doorbell/camera/communication system to see what we can find.
Placing a camera and communication system into a home's doorbell is becoming increasingly popular. What goes into the design of one of these systems? Let's find out.
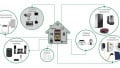
In this teardown, we'll be opening up a smart doorbell system called Ding from zmodo. This home package indeed looks to be (to use the tagline from zmodo) "A complete solution for the front door." This package—technically called the Ding Home Package—comes with everything needed to watch and protect your front door: a camera integrated into the doorbell, window and door sensors, and all the tools that should be required for installing the system.
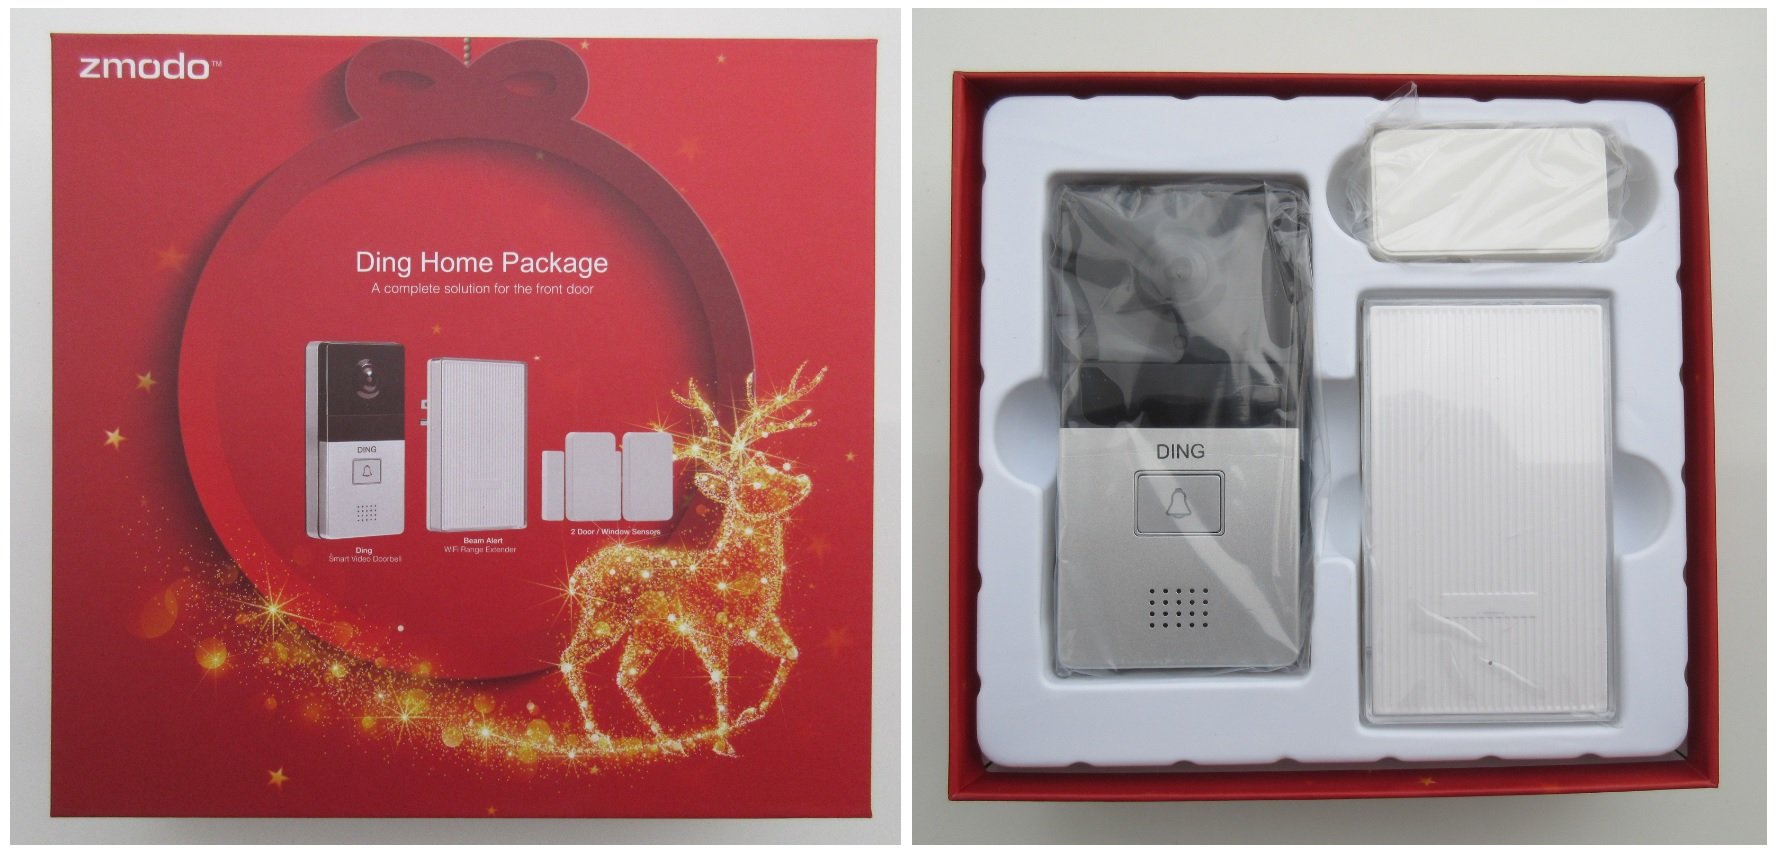
zmodo's Ding Home Package ("a complete solution for the front door")

Everything that's included: two door/window sensors, a camera, a power accessory, and installation tools.
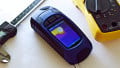
The Power Accessory
Referred to as the Power Accessory by zmodo, this device is an optional add-on to properly regulate the power/voltage that is supplied by your house—making it compatible for the Greet (the smart doorbell portion of the system that we'll open up later).
_-_Power_Accessory_assembled.jpg)
The power accessory module.
The figure below shows the PCB that resides inside this power accessory module.
_-_Power_Accessory.jpg)
The components that live inside the power accessory device.
- Microcontroller: Part marking G2231
- NPN Transistor: Part marking 13Q
- MOSFETs: Part marking T04N15
- Triac Driver: Part marking Fairchild 3012
As you can see, the exposed copper is either plated with ENIG or hard gold.
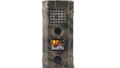
Beam Alert
The Beam Alert, also referred to as the Smart Range Extender, is packed full of electronics! I was actually quite surprised to see all the electronics that fill this rather unassuming enclosure.

The Beam Alert (aka the Smart Range Extender) simply plugs into an AC outlet and has Wi-Fi capability.
There are no screws holding this enclosure together; the two plastic pieces simply detach... with a little encouragement from a flathead screwdriver.
As shown in the image below, blue TIM (thermal interface material) and a heat plate are used to help dissipate any heat; the perforated section of the enclosure allows for the heat to dissipate into the surrounding environment.
-Beam_Alert_disassembled.jpg)
The Smart Range Extender disassembled; notice the blue TIM and an attached metal heat plate.
Inside this Smart Range Extender are three PCBs that are used for converting the AC voltage to DC and for the wireless communication.
The two PCBs in the figure below are used for both RF communications and converting AC voltage to DC.
_-_Beam-Power_Supply.jpg)
These two PCBs, which are connected together using wires, are responsible for RF communications and power conversion.
- Voltage Monitor: Part marking APAA
- Voltage Regulator: Part marking ADJG
- Microcontroller: Part marking 8L151G
- Unknown IC 2-pin: Part marking 1643 (no datasheet could be found)
- Unknown IC 8-pin: Part marking BJV6QB (no datasheet could be found)
- Bridge Rectifier: Part marking MB10S
- RF Transceiver Module: Part marking RF69
- Y1 Capacitor: Part marking JEC JD471K
- X2 Capacitor: Part marking MEX/Tenta MKP; 0.1uF 275VAC
- MOV: Part marking CNR 10D561K
- Notice the PCB slots; these gaps most likely are used to satisfy the creepage and clearance specifications as called out in IPC standards.
The third PCB, which connects to one of the other PCBs using a board-to-board connector, contains the Wi-Fi circuitry.
_-_Beam-Wi-Fi.jpg)
This PCB contains the Wi-Fi communication circuits.
- Wi-Fi SoC: Part marking QCA9531
- PNP Transistor: Part marking 2F
- DRAM: Part marking Winbond W9751G6JB
- Wireless LAN Power Amplifier: Part marking SiGe 2576L
- SPDT High Power Switch: Part marking Sky 3370
- Unknown IC: Part marking R7S
- Flash Memory: Part marking Winbond 25Q64FVSIG
Window/Door Sensors
Included with this home package are two window/door sensors. These sensors use magnetism for detecting when a door or window has been opened.
The figure below shows two parts of a single sensor; one part contains all the electronics (including the magnetic sensing circuitry and the wireless communications circuitry) while the other part is much less complicated as it simply contains a magnet.

Looking inside two pieces of a single window/door sensor.

The PCB that contains all the electronics of a window/door sensor.
- Unknown IC: Part marking S5 (no datasheet could be found)
- NPN Transistor: Part marking 13Q
- Microcontroller: Part marking G2452
- Reed Switch: No part marking
- Transmitting Module's unknown IC: Part marking 9A6 (no datasheet could be found)
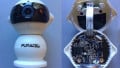
The Greet (Smart Doorbell)
Similar to the Beam Alert module, the camera module, technically referred to as the Greet (or Smart Doorbell), also has an impressive amount of electronics crammed into its enclosure. Its features include a camera, a light sensor, a microphone, an infrared LED, a motion sensor, and a speaker.
Only five screws are used for holding this module's rear plastic piece attached. After removing these screws we can take a glimpse of the internal workings.

With the removal of five screws, we can begin to see the Greet's internal electronics.
Approximately fifteen additional screws hold all the internal components securely in place. As mentioned before, this enclosure contains many electrical subassemblies, including a rechargeable battery, flex circuits, PIR sensors, a speaker, a microphone, antennas, wires, a camera (of course), and multiple PCBs, all of which are neatly and professionally organized.

Getting a peek at all the internal components inside this Smart Doorbell.
The following two figures show all the components that reside inside this module, and while not all of the electrical components have been identified, most of the major ones have been singled out.
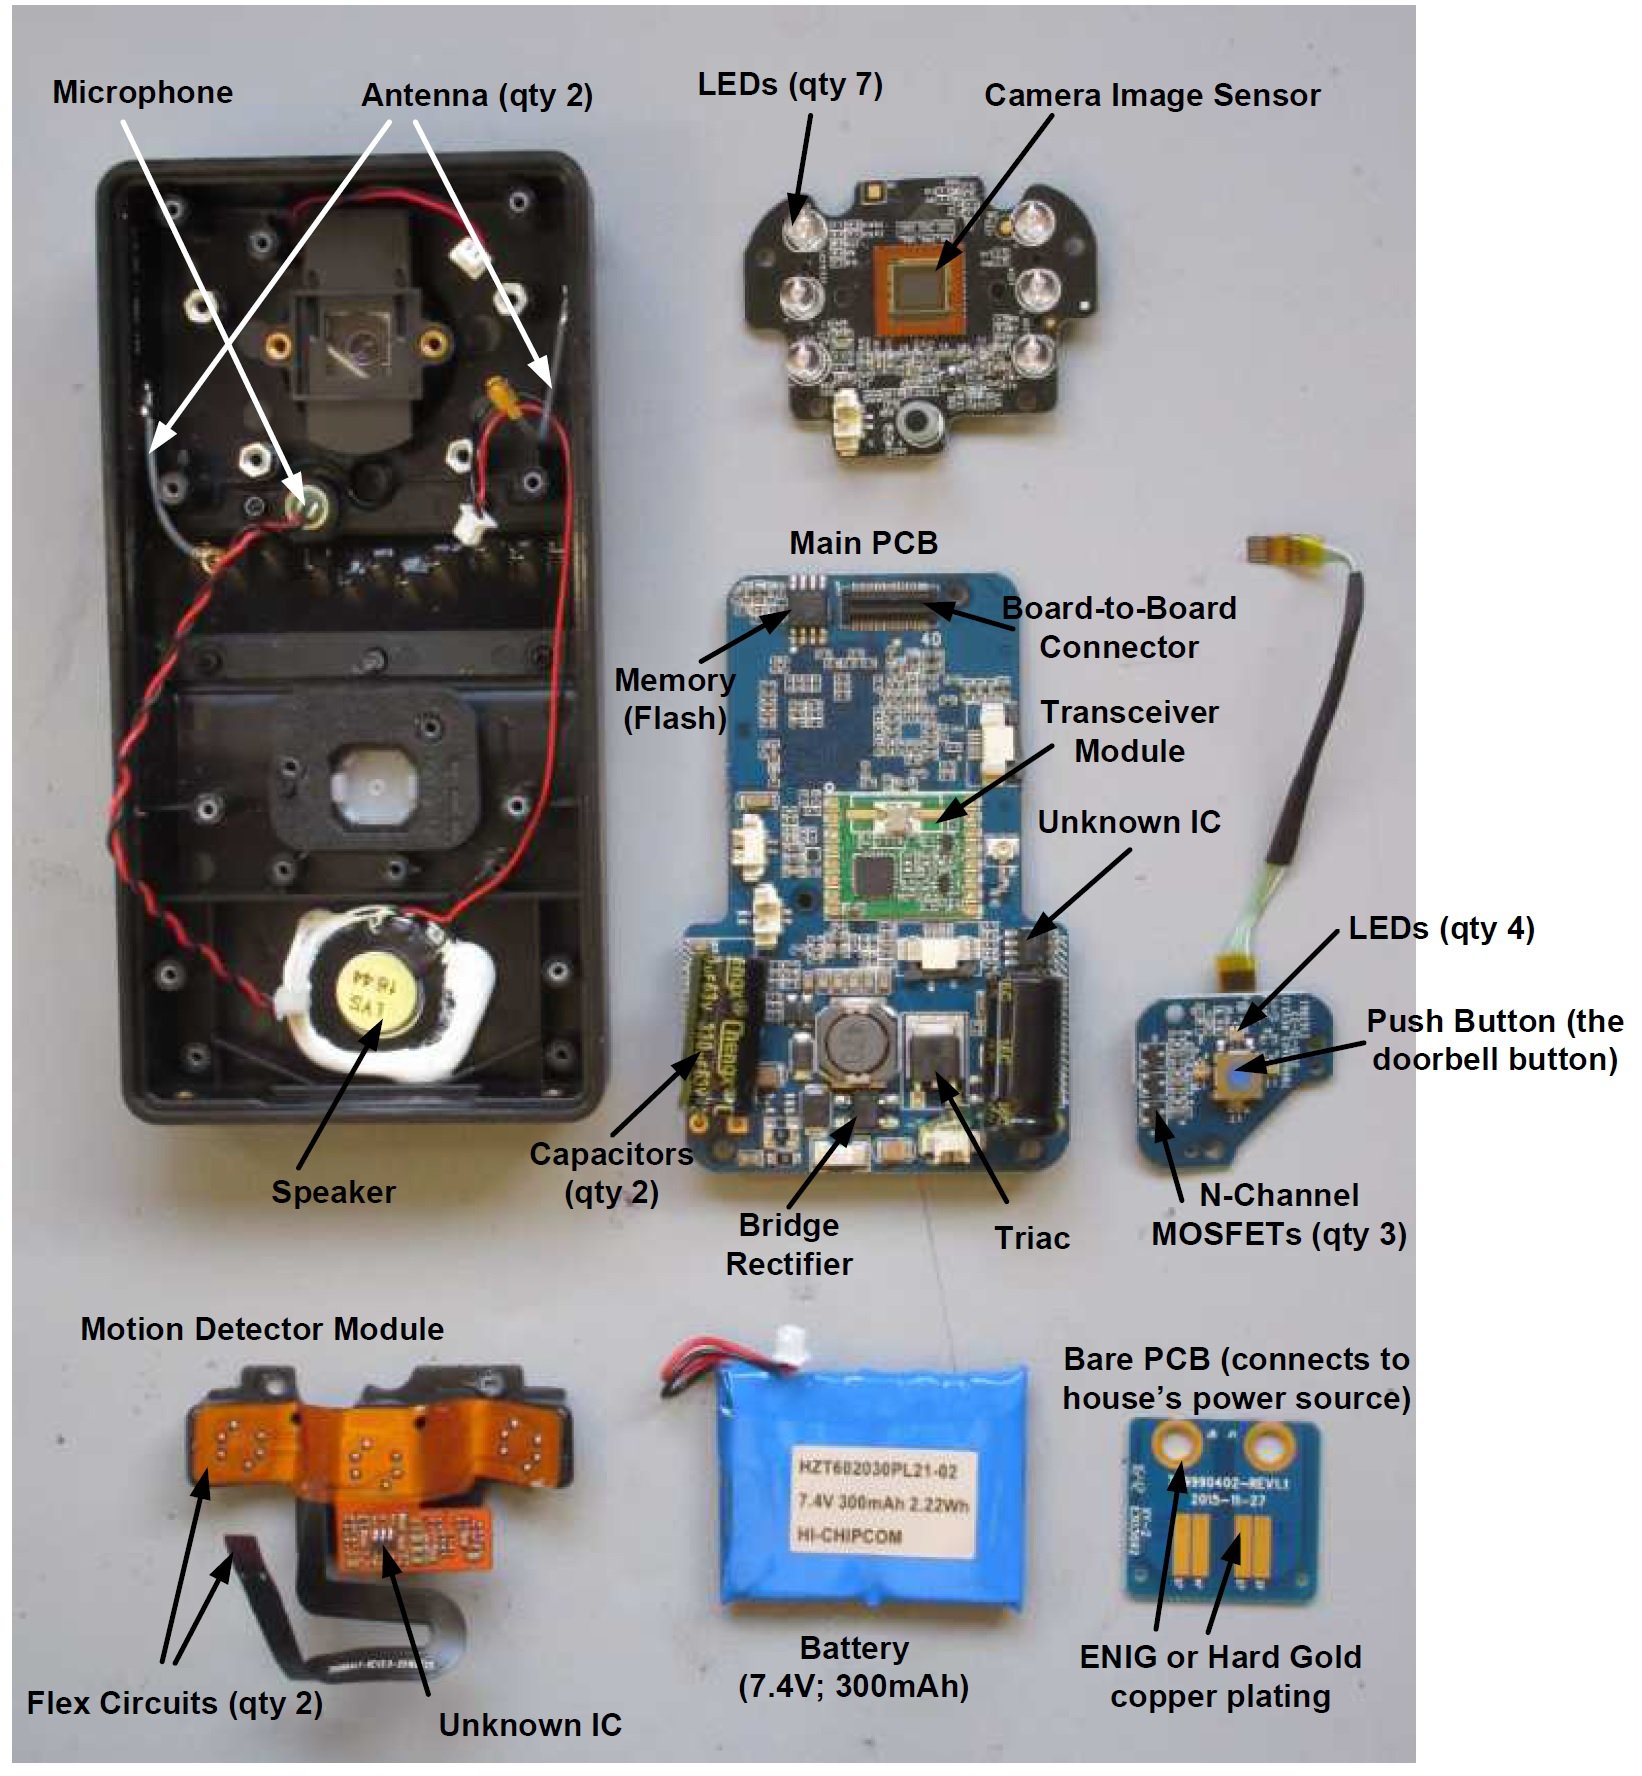
All the components located inside the Greet: one side of the PCBs.
The camera image sensor is the real magic in this system, but, unfortunately, this device has no markings on it; not having part markings seems to be the case with other image sensors too... at least in my experience.
- Main PCB
- Transceiver Module: Part marking RF69
- Triac: Part marking ST T40560
- Bridge Rectifier: Part marking MB10S
- Memory (Flash): Part marking SPANSION FL127SIF10
- Push Button PCB
- N-Channel MOSFET: Part marking: 702

The other side of the PCBs.
- Main PCB
- WLAN: Part marking RealTek (RTL8818EUS)
- DRAM: Part marking SEC643 (no datasheet could be found). Since no datasheet could be located for this device, I am assuming that this IC is DRAM.
- Voice Processor: Part marking forte media (FM1188)
- Voltage Regulator: Part marking LM5576
- Battery Charger: Part marking MP26123
- Camera SoC: Part marking Hi3518
- PIR sensors: Part marking AL612
Conclusion
zmodo refers to the Ding Home Package as "a complete solution for the front door" and I'd say they hit the nail on the head, given all the goodies that are included. Equally impressive is the degree to which each of the subassemblies appears to be designed and manufactured with professionalism and care.
Next Teardown: Powered Ultra-High-Definition HDMI Splitter
Related Content