Facebook
 Google
 GitHub
 Linkedin
Feeling Flashy? Tone It Down with the Gentleman Maker’s Raspberry Pi Colorboringizer
In this episode of the Gentleman Maker, we'll use a Raspberry Pi 3 Model B, an Arduino Nano, and an Arduino Uno to create a handy system to rid ourselves of overly-colorful fashion choices.
In this episode of the Gentleman Maker, we'll use a Raspberry Pi 3 Model B, an Arduino Nano, and an Arduino Uno to create a handy system to rid ourselves of overly-colorful fashion choices.
Having too much excitement in one’s life can cause serious defects. Such defects include happiness, enjoyment, and feelings of an ecstatic nature. To prevent the loss of dignity and composure that comes with these feelings, it is important to minimize sources of excitement, which can range from too much sugar in tea to forgetting to apologize for something that had nothing to do with you. (Try my auto-apologizer for help with the latter issue.)
Personally, I find my workshop a tad too colorful (mainly because I am too money-conscious to buy proper electronic storage units). So, I believe that wearing boring colors will help.
But how do I know if the colors I am wearing are boring enough?
Well, as I understand it, computers never lie. So, in this Gentleman Maker episode, we will create the Colorboringizer, a device that can scan our clothes and confirm that they are—or are not—boring enough for a proper Englishman!
The Colorboringizer BOM
- Arduino Nano
- Arduino Uno
- Servo
- TCS3200 Color Sensor
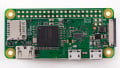
- Raspberry Pi 3 Model B
- Tactile switch
- Speaker and cables
- Wires
- Building materials (wood, card, plastic, etc.)

The Project Idea
The project is made up of three main parts:
- A handheld color scanner that is used to scan clothes
- A borspectrometer (patent pending Gentleman Maker) that consists of an Arduino Uno and a micro servo
- A Raspberry Pi with speaker and connections to all external parts
To start, the button is pushed on the handheld scanner, which starts the reading. This button is held for the duration of scanning. When scanning is done, the button is released, and the readings are sent to the Raspberry Pi for boring-detection.
The result of the Raspberry Pi is then sent to the Uno, which then sets the servo to display the boring result on the borspectrogrpah (patent pending Gentleman Maker). The result of the borspectrograph (patent pending Gentleman Maker) also determines what the system should play on the speaker—a judgment of "Looking bland!" or "Careful!" denoted by an appropriate sound effect.
The Schematic

The Colorboringizer heavily borrows from earlier Gentleman Maker videos, whereby the Raspberry Pi runs the main Python script and an external Arduino is used to make measurements or control external devices.
For this project, two Arduinos are used: the Arduino Nano is used in the color detection probe and the Arduino Uno is used to control the servo, which points to our clothing color result on the face of the Colorboringizer display. None of the components used in this project require any support circuitry, thanks to the use of modules as opposed to discrete circuitry. Power for the project is provided entirely with the use of a single 5V source powering the Raspberry Pi.
You can find the full Scheme-It schematic for this project here.
The Code
The Raspberry Pi runs a Python script that performs the following functions:
- Taking readings from the Arduino Nano
- Manipulating these readings and performing calculations to detect the boring level
- Sending servo positions to the Arduino Uno
Detecting the boringness of colors can be done in many different ways, but this project looks at how far spread individuals channels are, in addition to comparing the averages of the different color channels. This means that wearing similar colors will be considered boring, and wearing two contrasting colors (such as black and white) will be considered too exciting.
Each comparison adds to an overall excitement score, such that you are allowed to get away with small amounts of excitement—but if there are too many exciting conditions, the servo will be made to point towards “Too Exciting”. The excitement score also determines whether a boring or warning sound is played as an audio cue.

The Arduino Uno runs a very simple program that uses the serial port library and the servo library. The Arduino first opens a serial port using a baud rate of 9600 and attaches a servo object to pin 9. Then, in the main loop, the code starts by checking for new data on the serial port.
If data has arrived, the serial byte is checked against three possible commands.
- R: This resets the servo position to 90 (this points the display to “Ready for scanning”).
- P: This tells the servo to point to the “Passed” position.
- F: This tells the servo to point to the “Failed” position.
The Arduino Nano also runs a very simple program that uses the serial library. Upon startup, the Nano configures its I/O pins so that it can communicate with the TCS3200 color sensor. which uses timed pulses to represent color intensity of R, G, B, or W. The main loop constantly checks for a button press and, when a press is detected, the code takes readings from the TCS3200, sends these readings over the serial port, and then delays for 1.5 seconds.
To make decoding the readings easier, the data sent over the serial port uses the @ symbol as a parser, where the first parsed number represents the red channel, the second parsed number represents the green channel, and the third represents the blue channel.
You can find the full Colorboringizer code available for download at the end of this project.
And with that, you have everything you need to take your own fashion down a notch!

Want to see more Gentleman Maker creations? Look no further.
- Take a Gander at Wildlife with Your Raspberry Pi: The Gentleman Maker’s Life-Cam!
- Save for Your Own Royal Wedding (of Sorts) with the Gentleman Maker’s Savings Incentivizer
- The Gentleman Maker’s Sun Informer Lets Homebodies Safely Enjoy Intermittent Sunshine
- The Gentleman Maker’s Auto-Apologizer: A Clever, Polite Device for the Everyday Brit
- How to Make an IoT Teapot so You Can Put the Kettle on from Your Smartphone