 Facebook
 Google
 GitHub
 Linkedin
Getting Started with OPENOCD Using FT2232H Adapter for SWD Debugging
Learn how to make flashing your ARM-based MCU easy by using OpenOCD debugger with an FT2232H adapter.
Learn how to make flashing your ARM-based MCU easy by using OpenOCD debugger with an FT2232H adapter.
Old MCUs from vendors like ATMEL and MICROCHIP, like the PIC16F and Atmega family, tend to have a special programming interface to program internal flash. For example, Atmega used SPI pins (MISO, MOSI, SCK) and PIC used two pins (PGC, PGD)— one as a clock and another as a bi-directional data line.
New MCUs, especially with an ARM core, use JTAG/SWD as a programming/debugging interface.
What is the difference between Joint Test Action Group (JTAG) and Serial Wire Debug (SWD)? The answer is that SWD was created as an alternative to JTAG to save pins in the MCU package: SWD replaces the 5-pin JTAG interface with one that's only 2-pin.
To communicate with our target chip, we need a program on the host and hardware as a bridge between the host and the chip. In this tutorial, we will use OpenOCD as the program on the host to send commands and communicate using SWD. We'll use an FT2232H as the bridge to translate signals from the USB port to the SWD interface.

SWD interface signals
Overview of OpenOCD
Open On-Chip Debugger (OpenOCD) is a free, open-source project that aims to provide debugging, in-system programming, and boundary scan using a debug adapter. The adapter is a hardware module that provides the right signals for the target to understand.
OpenOCD debugger supports a lot of debugging adapters, which can be viewed on the OpenOCD website.
To make OpenOCD work, you should configure it using commands or by using configuration files. When configuration is done and a connection with the target is established, OpenOCD will start running as daemon. Daemon is a background process that answers requests for services. OpenOCD will now wait for connections from GDB, Telnet, or whatever other channel and process given commands.

OpenOCD block diagram
Overview of FT2232H
FT2232H is dual high-speed USB to multipurpose UART/FIFO IC. This means it is a single-chip USB with dual ports.
Every port is equipped with an engine called a Multi-Protocol Synchronous Serial Engine (MPSSE) to simplify a synchronous serial protocol (USB to JTAG, I2C, SPI, or bit-bang) design. This allows users to configure the channel with the desired protocol. MPSSEs are available on channel A and channel B and can be configured to allow any synchronous serial protocol.
Be Aware Before Selecting OpenOCD
Selecting OpenOCD as your debugging tool with an adapter like FT2232H is a very good choice when you don’t have much budget to work with.
In addition to being free and open source, OpenOCD also has a good support community. BUT, as with any other open-source tool, you could face bugs you may need to fix by yourself.
It took me some time to understand how to make OpenOCD work and flash my MCU, and I hope this tutorial will be a good and complete reference.
Also, I advise anyone searching for debugging tools to choose wisely. For example, if you need a simple tool, I think OpenOCD might not be the best choice for you!
Other good alternative debugging tools are:
- Segger J-Link
- ULINK
- Default debuggers embedded into evaluation boards (like STM32, EFM32, and other MCU families) by silicon vendors
In conclusion, if you don’t have much budget, time, or patience, OpenOCD with FT2232H will be a great choice for you.
Requirements
Here is what you'll need to complete this tutorial:
- FT2232H breakout board
-
Windows or Linux OS with a working copy of OpenOCD
-
Target chip to flash
Let's go over each piece individually.
- FT2232H breakout board:
You can get a cheap one from Chinese suppliers like Taobao, Alibaba, and AliExpress. I ordered mine from Taobao for about $14.
You can also order the official FTDI module, the FT2232H Mini-Module.


FT2232H breakout boards
- Windows or Linux OS with a working copy of OpenOCD:
Windows: You can get an executable version of OpenOCD from unofficial binary packages.
Linux: You can get it from the package pool of your Linux distribution, like debian package.
Or you can build it from source code, the hard way! This is the route I chose to go, personally. You can find useful guides on how to do this, like the one from Dangerous Prototypes (for Windows), or eLinux (for Linux). You can also read compilation instructions from OpenOCD source code (README.Windows and README).
Note: Some time ago, the OpenOCD development team decided not to provide any official binaries anymore. They only offer the source code, expecting the vendor of the JTAG hardware to build the binaries. Ensure the binary you use supports your JTAG hardware.
- Target chip to flash:
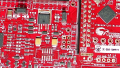
I chose my breakout with EFM32G200F32, an ARM Cortex-M3-based microcontroller (MCU), but any other supported MCU will work.

My EFM32G200F32 breakout board

EFM32G200F32 pinout
How OpenOCD Is Organized
To make OpenOCD run, you just need a correct configuration file (.cfg) supplied to OpenOCD. This configuration file has commands which are extensions to Jim-Tcl. Jim-Tcl is a programming language that provides a simple and extensible command interpreter.
The OpenOCD directory file has a folder called “scripts”. In this folder, you will see "interface", "board", and "target" folders. And these are pretty much the only folders you need.
- Interface: Configuration files for hardware adapters, for example “minimodule.cfg”.
- Board: Configuration files for common development boards like “atmel_sam4s_xplained_pro.cfg” - “olimex_stm32_h107.cfg” - “stm32f4discovery.cfg” .. etc. You can see that these files reuse configuration files from interface and target.
- Target: Configuration files for MCU Chips.
However, you can write your own configuration files, which we're going to do in this tutorial.
When we run OpenOCD, we can give it as many configuration files as we want:
openocd -f config1.cfg -f config2.cfg -f config3.cfg
Understanding the Basics of Adapter Configuration
First, we need to tell OpenOCD the type of adapter that it will work with by using an interface command.
To see the complete list of interfaces that your version of OpenOCD supports, use this command:
>openocd -c interface_list
In our tutorial, we will use an adapter with FT2232H chip, so we will use an FTDI interface driver:
interface ftdi
You must also tell OpenOCD more information about your adapter (interface). For example, you need to specify the VID/PID, serial number, or the number of the channel you will use for FT2232H, since it has two channels.
ftdi_vid_pid 0x0403 0x6010
ftdi_channel 1
ftdi_serial "FTZ7O8O0"
The adapter can support more than one transport protocol, so OpenOCD allows you to select the transport protocol:
transport select swd
You should also tell OpenOCD the initial values of the FTDI GPIO data and direction registers through the ftdi_layout_init command. You should first put the initial values of the channel’s 16 pins, and then the directions. Knowing that "1" is for selecting direction as output and "0" is for input, and each channel in ft2232H has 16 pins.
ftdi_layout_init 0x0018 0x05fb
This means:
Low output data = 0x18 // 0001 1000
Low direction = 0xfb // 1111 1011
High direction = 0x05 // 0000 0101
To see more about adapter configuration, you can refer to OpenOCD manual.
Connecting Target with Adapter
There is a configuration file called “swd-resistor-hack.cfg” that includes a wiring diagram:

FT2232H wiring with target
The file includes a note:
“Connect TDI to SWDIO via a suitable series resistor (220-470 Ohm or so depending on the drive capability of the target and adapter) connect TDO directly to SWDIO.”
Without wiring this resistor in this way, a connection will not be established.

FT2232H pinout
Putting It All Together
Let us now try to make a connection between the adapter and target using OpenOCD.
Part 1: Make the Required Wired Connections

Connecting FT2232H with target
Part 2: Run OpenOCD
First, make a special configuration file to our adapter. Create a new txt file (ANYNAME.cfg). Remember to edit the VID/PID and serial to match your chip:
#This configuration file is created for a tutorial:
#”Getting Started with OPENOCD Using FT2232H Adapter for SWD Debugging”
#Written by:Yahya Tawil - yahya.tawil_at_gmail.com
#Pulished on: http://www.allaboutcircuits.com
#Version of OpenOCD:0.9.0
interface ftdi
transport select swd
ftdi_vid_pid 0x0403 0x6010
#ftdi_device_desc "USB Serial Converter A"
#ftdi_device_desc "FT2232H 开发板"
ftdi_serial "FTZ7O8O0"
#adapter_khz 8
ftdi_layout_init 0x0018 0x05fb
ftdi_layout_signal SWD_EN -data 0
ftdi_layout_signal nSRST -data 0x0010
Note: Defining the SWD_EN signal is important for making OpenOCD work, even though we didn’t connect it physically. If we don't, an error will appear:
Error: SWD mode is active but SWD_EN signal is not defined
Windows:
After you download a copy of OpenOCD as we described previously, run CMD console, then go to the directory where OpenOCD is present. For example:
cd Desktop\openocd-0.9.0\bin
Remember: We have a configuration file (I named it SWD_FT.cfg) and the target is one of the EFM32 chips.
Then, in CMD, type:
openocd -f interface/ftdi/SWD_FT.cfg -f target/efm32.cfg
Linux:
In the terminal, type:
Sudo openocd -f interface/ftdi/SWD_FT.cfg -f target/efm32.cfg
You should now get something like:
Info : FTDI SWD mode enabled
adapter speed: 1000 kHz
cortex_m reset_config sysresetreq
Info : clock speed 1000 kHz
Info : SWD IDCODE 0x2ba01477
Info : efm32.cpu: hardware has 6 breakpoints, 4 watchpoints
If you have any problems, take a look at the troubleshooting section— it could be bad wiring or a driver problem for Windows users.
Part 4: Open Telnet connection
Open another CMD window and type:
telnet localhost 4444
Part 5: Communicate with target
Remember to halt your target before any debugging operations:
>reset halt
You will get something like:
target state: halted
target halted due to debug-request, current mode: Thread
xPSR: 0x01000000 pc: 0x00000bbc msp: 0x20002000
To read internal registers from our chip, type:
>reg

Response of reg command
To flash an image to internal flash, we need to define internal flash banks. It could be one bank like our present target, “efm32.cfg” did for us. To make sure, type the following:
>flash info 0
Or
>flash list
>flash banks
It will return the following:
#0 : efm32.flash (efm32) at 0x00000000, size 0x00008000, buswidth 0, chipwidth 0
Now, to flash our program, use flash write_image command.
This command accepts bin (binary), ihex (Intel hex), elf (ELF file), s19 (Motorola s19), mem, or builder formats.
>flash write_image erase "Desktop/FirstApp.hex"
You should get something like:
auto erase enabled
wrote 1536 bytes from file Desktop/FirstApp.hex in 0.124740s (12.025 KiB/s)
Now make your target run again using this command:
>reset run
To exit Telnet connection, just type:
>exit
Read OpenOCD manual to know more about flashing memory using OpenOCD.
Troubleshooting
Example error 1:
- Error: unable to open ftdi device: usb_open() failed
This error could be caused by using libusb driver in windows while new versions of OpenOCD use WinUSB driver.
First, make sure that you stop Windows from installing a driver automatically:


Then remove your default FTDI driver. You can use a tool from FTDI called CDM Uninstaller x.x - Windows Device Driver Uninstaller: Just enter your VID and PID.
Note that the default FTDI Vendor ID is 0x0403. The default Product IDs are as follows:
- Single-channel devices (R Chips): 0x6001
- Dual-channel devices (2232C/D/H Chips): 0x6010
- Quad-channel devices (4232H Chips): 0x6011
Read more here.
Finally, use Zadig Tool to install WinUSB driver.
Example error 2:
- Info : clock speed 1000 kHz
in procedure 'init'
in procedure 'ocd_bouncer'
This error is caused by incorrect wiring or missing the resistor between TDI and TDO in “swd-resistor-hack.cfg” as we mentioned above.
It could also be caused by a bad configuration like missing ftdi_layout_init command from configuration file:
ftdi_layout_init 0x0018 0x05fb
Example error 3:
- Error: libusb_open() failed with LIBUSB_ERROR_ACCESS
Error: no device found
Error: unable to open ftdi device with vid 0403, pid 6010, description '*' and serial 'FTZ7O8O0'
A similar error message will pop up when you run OpenOCD in Linux without permission. Make sure you run OpenOCD with sudo, “sudo opeocd”.
References:
[1]Using OpenOCD as a Standalone FLASH Programmer (a simple tutorial) - Olimex
[2]Flash Commands - OpenOCD Manual
[3]Debug Adapter Configuration - OpenOCD Manual
[4]Getting Started with the ARM GCC Compiler on Windows, Part 5: Debugging with OpenOCD
[5]Configuring OpenOCD for the AT91SAM7S
[6]General Commands - OpenOCD Manual
[7] OpenOCD - eLinux
[8] FT2232H DataSheet (PDF)


Great article! Very useful! Thanks.
Thank you for this article. It was the most clear and informative that I have found so far to a novice like me.