Facebook
 Google
 GitHub
 Linkedin
Introducing the PICAXE System
This introduction to the PICAXE microcontroller overviews the economical, versatile, and fun-to-use MCU family with which all designers should become familiar.
Recommended Level
Beginner
The PICAXE system takes the user-friendliness you have come to associate with board-level products like the Arduino, and moves it down to the chip level, allowing hobbyists and professionals to construct projects that are smart, compact, and economical.
Current Product Family
There are presently seven members of the PICAXE family of microcontrollers, and they are divided into two categories. The entry level µCs are the 08M2+, 14M2, 18M2+, and 20M2; the advanced level includes the 20X2, 28X2, and the 40X2. As you may have guessed, the first two numbers in the model designation reveal how many leads each has – from eight leads on the 08M2+ all the way up to 40 leads on the 40X2.
The table below provides additional baseline information about the PICAXE lineup. Full details are available from the PICAXE site.
| Model | Inputs/Outputs | Ram (bytes) | Program Memory (bytes) | Max. Frequency (MHz) | Operating Voltage | Physical Configuration* |
|---|---|---|---|---|---|---|
| 08M2+ | 6 | 128 | 2048 | 32 | 2.3 - 5.5 | .3" wide DIP |
| 14M2 | 12 | 512 | 2048 x 2 | 32 | 1.8 - 5.5 | .3" wide DIP |
| 18M2+ | 16 | 512 | 2048 x 2 | 32 | 1.8 - 5.5 | .3" wide DIP |
| 20M2 | 18 | 512 | 2048 x 2 | 32 | 1.8 - 5.5 | .3" wide DIP |
| 20X2 | 18 | 256 | 4096 | 64 | 1.8 - 5.5 | .3" wide DIP |
| 28X2 | 22 | 1280 | 4096 x 4 | 64 | 1.8 - 5.5 | .3" wide DIP |
| 40X2 | 33 | 1280 | 4096 x 4 | 64 | 1.8 - 5.5 | .6" wide DIP |
* Surface mount packages are theoretically available, but can be hard to find.
Each PICAXE µC contains a bootstrap program that enables it to be programmed without a separate hardware programmer. All that is required is a three-wire download cable, either USB or serial, depending upon which port type is available on the computer being used. Programming software is freeware, and versions are available for Windows, Linux and Mac operating systems. The code itself is a version of BASIC, which is easy to learn and use, and quite powerful.
Background
The first PICAXE was the brainchild of Clive Seager and was based on the PIC16F872 microcontroller introduced by Microchip in 1999. Seager realized that the 5V in-circuit serial programming capability of the 16F872 could eliminate the need for a separate hardware programmer if the PIC could be made to respond to incoming serial commands. He developed a bootstrap code that would do just that and programmed it into the PIC µC. With the subsequent development of a customized version of the BASIC programming language, the first PICAXE system was born.
As you likely know, BASIC is an acronym for Beginner's All-purpose Symbolic Instruction Code, and is the first high-level programming language that many people learn. Seager chose it for the PICAXE because of that very reason. He wanted to expand the user base of microcontrollers beyond professional programmers, and believed that the simplicity and the power of BASIC made it the right choice for the PICAXE system.
In the foreword to J. R. Hackett’s book, PICAXE Microcontroller Projects for the Evil Genius, Seager wrote the following:
“…the PICAXE system was designed as a method of allowing schoolchildren to use all the power of Microchip PICs…without any of the technical difficulties of complicated hardware or complex programming languages. [Since then, it] has been adopted by hundreds of thousands of other users—industrial, hobbyist, and educational…”
Seager felt so strongly about the educational value of the PICAXE system that he named the company, “Revolution Education,” or “Rev-Ed" for short. His dream has been largely realized in England and other parts of the UK. However, the PICAXE is not as widely used in the US or the rest of the world.
To see some of the things a PICAXE will do, take a look at the Project Gallery.
PICAXE Minimum Programming Requirements
The hardware requirements for trying your hand with the PICAXE system are quite simple and relatively inexpensive; no separate hardware programmer is required. In addition to a regulated, filtered DC power source (+5V preferred,) a solderless breadboard, and some AWG22 solid hook-up wire, you'll only need the following:
- PICAXE chip, the least expensive of which is the 08M2+ ($3.00 or less)
- 3.5mm three-conductor jack similar to the CUI SJ1-3533NG (about $1.50)
- 10kΩ, 1/8W or larger resistor
- 22kΩ, 1/8W or larger resistor
- .1µF, 16V or larger ceramic capacitor
- AXE027 USB programming cable (about $20)
The PICAXE minimum programming circuit is shown in the schematic below. Note that if your computer has a serial port, you can substitute an AXE026 serial programming cable for the AXE027 and save a little over $10. If you're working with heavy budget constraints, it is possible to make your own serial cable. One word of caution: don’t be tempted to buy a USB to serial converter unless you really know what you are doing. Most of them won’t work with the PICAXE system. A future installment of this series will deal with both issues in more detail.

The software requirements are even less expensive than the hardware (as in freeware with no nag screens and no upgrade pitches). For Windows users, the latest offering is called PICAXE Editor 6, and consists of a full-featured IDE (integrated development environment) and a flowchart coding aid. For Mac or Linux operating systems, there is AXEpad, which also will run under Windows. Both options include and support a very capable version of BASIC. Check the software out here, and see the list of PICAXE BASIC commands here.
Labeling Variations
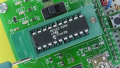
Clive Seager and Rev-Ed maintain a close relationship with Microchip, the developer and manufacturer of all PIC microcontrollers. PICAXE µCs began with a PIC, and they are still based on PICs despite some variation in the labeling. In the photos below, notice that the Microchip logo does not appear on the PICAXE 08M2+, but does appear on the PICAXE 20M2. On the X2 parts, the Microchip part number is the only ID shown, as demonstrated by the photo of the PICAXE 40X2.

Final Thoughts
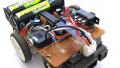
If all this talk of “easy” and “inexpensive” has you thinking the PICAXE is just for kids, don’t be mislead. PICAXE µCs are capable of controlling some amazing projects from wireless weather stations to robots to near space exploration and much more. There's even a PICAXE in orbit.
The countdown timer breadboard in the photo below was built by the author using a PICAXE 20M2 that is all but hidden behind the three LEDs.
.png)
For more information, ask a question or conduct a search on the AllAboutCircuits forum, or take a look at the PICAXE forum. You are almost sure to find loads of ideas that pique-axe your interest.
Next Article in Series: PICAXE to PC Connections