Facebook
 Google
 GitHub
 Linkedin
PICAXE Programming Basics - Part 2
This article is part 2 of a two-part series that introduces the tools and techniques for programming PICAXE microcontrollers. Part 1 focused on construction of a test circuit and the AXEpad IDE; part 2 covers the PICAXE Editor 6 IDE.
Recommended Level
Beginner
Recommended Prerequisites
PICAXE Programming Basics - Part 1
Introduction
Part 1 of PICAXE Programming Basics included full information for assembling a PICAXE programming test circuit. That circuit will be used again in this article, so be sure that you have the assembly connected to your computer via your programming cable. Although not absolutely necessary, a review of programming using AXEpad will facilitate learning to program using PICAXE Editor 6.
PICAXE Editor 6
PICAXE Editor 6 (PE6) is the recommended Integrated Development Environment (IDE) for users of personal computers using Windows XP, Vista, 7, 8, and 8.1 operating systems. PE6 is the successor to Programming Editor 5, but is all new; none of the code from PE5 was reused. In addition, complete flowcharting capabilities are included in PE6, making Logicator unnecessary.
However, Revolution Education (Rev-Ed) programmers have preserved full compatibility with code that was written with previous IDEs...even AXEpad. They have accomplished this by using the same PICAXE basic language and the same compilers. In addition, they have maintained full support for all the associated hardware, including the current line of PICAXE µCs, all prior models, the minimum required programming circuit, the AXE027 USB cable, and the AXE026 serial cable.
As of 10 August, 2015, PE6 is at version 6.0.8.0, and is considered a stable beta version; it has been in beta since 2013, and still has some bugs being resolved. However, it is such an improvement over prior versions that its usability more than makes up for a few glitches. PE6 is not open source, but is freeware available here. Follow the instructions to download and install PE6 on your computer.
Start PE6. The start-up screen is shown below. Click the image for higher resolution.
The first thing you may notice is that Revolution Education has adopted the ribbon user interface style introduced by Microsoft in 2007. In PE6, there are three ribbons that are selectable near the top of the PE6 window: Home, Simulate, and PICAXE. The Home ribbon is primarity used for file handling and code editing; the Simulate ribbon controls simulations, and the PICAXE ribbon is sort of a catch-all for other functions. Just above left of the ribbon tabs is an area called the Quick Access Toolbar, which is yet another area for control icons. The nice thing about the QAT is that it is user customizable.

All three of the ribbons are simultaneously displayed below and, as you can see, there are some duplications: Syntax Checking is available on all three ribbons, and Program Download is available on the Home and PICAXE ribbons. The File tab (to the left of the ribbon tabs) drops down a menu that provides access to the Options menu and the Help menu; it also includes file handling commands such as open, save, save as, print, etc., thus duplicating all the File functions on the Home ribbon.

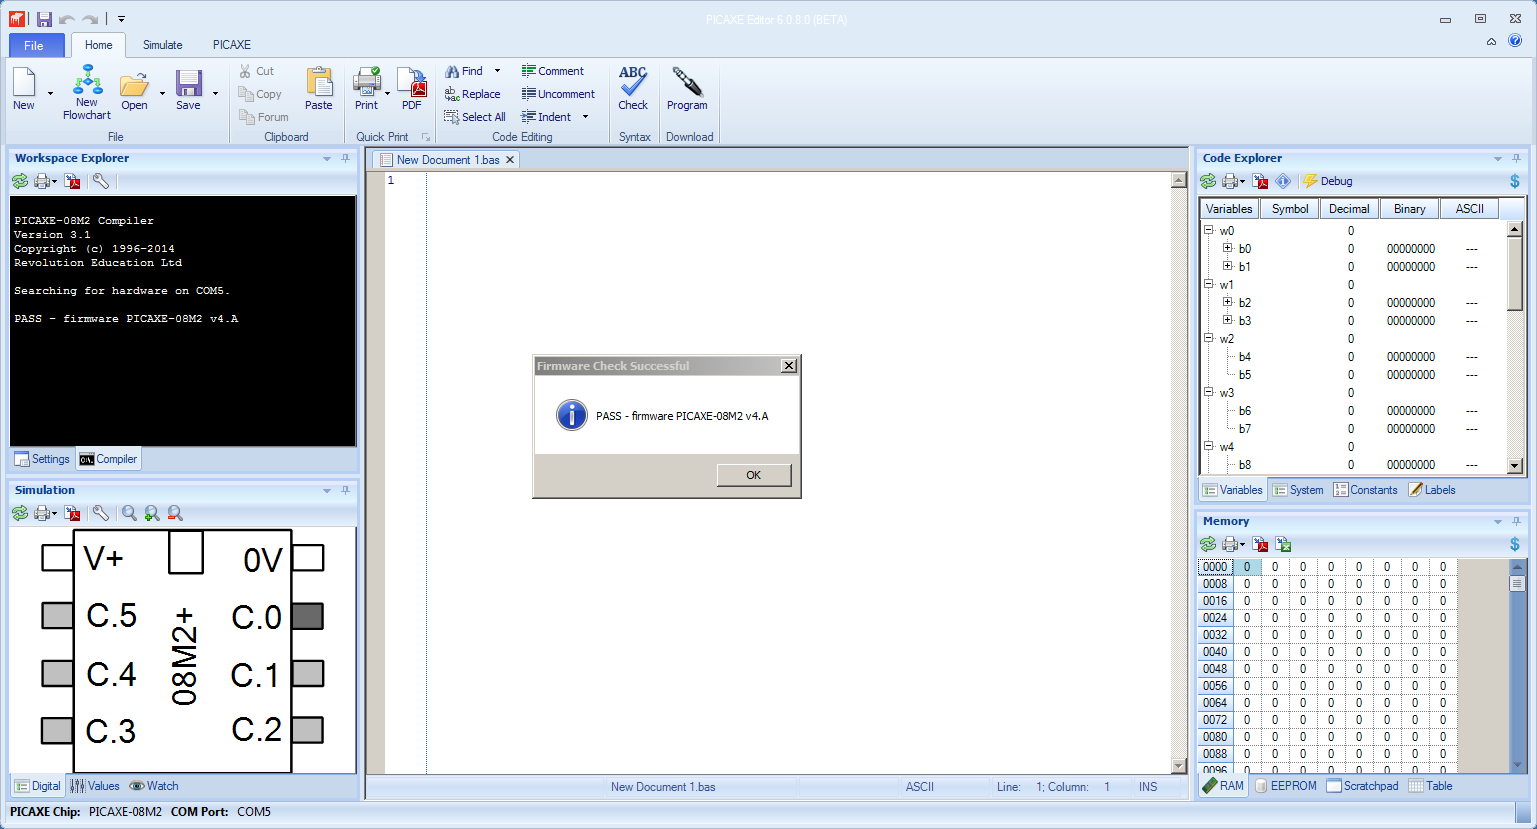
Now, look at the Workspace Explorer pane on the left just below the ribbon. Click on Refresh Com ports, and then use the pulldown to see the list of Com ports recognized by PE6. Choose the one that is connected to your PICAXE programming test circuit, and then click on Check PICAXE type connected. At that point, the Workspace Explorer pane will change from the Settings tab to the Compiler tab and try to locate and identify the PICAXE type connected to the Com port selected. Assuming that your PICAXE programming test circuit is properly built, correctly attached to your computer through a good programming cable, and powered up, you will see a Firmware Check Successful message box as shown below. Click the image for higher resolution.
Next, in PE6 click File, Open (or Home, Open) and navigate to where you stored Flash Grn & Red.bas from PICAXE Programming Basics - Part 1, and open the file. If you haven't yet downloaded and saved the file, do so now, and then open the file.
PE6 should display the file Flash Grn & Red.bas in the center pane, and it should look like the figure below. In the code, everything that is in green text is a comment that is not actually necessary for the program to run, but is included to explain the operation of the program. Note that a single apostrophe is used to denote the beginning of a comment. Each line in the code is commented, and should be sufficient for you to fully understand its purpose and operation. Click the image for higher resolution.
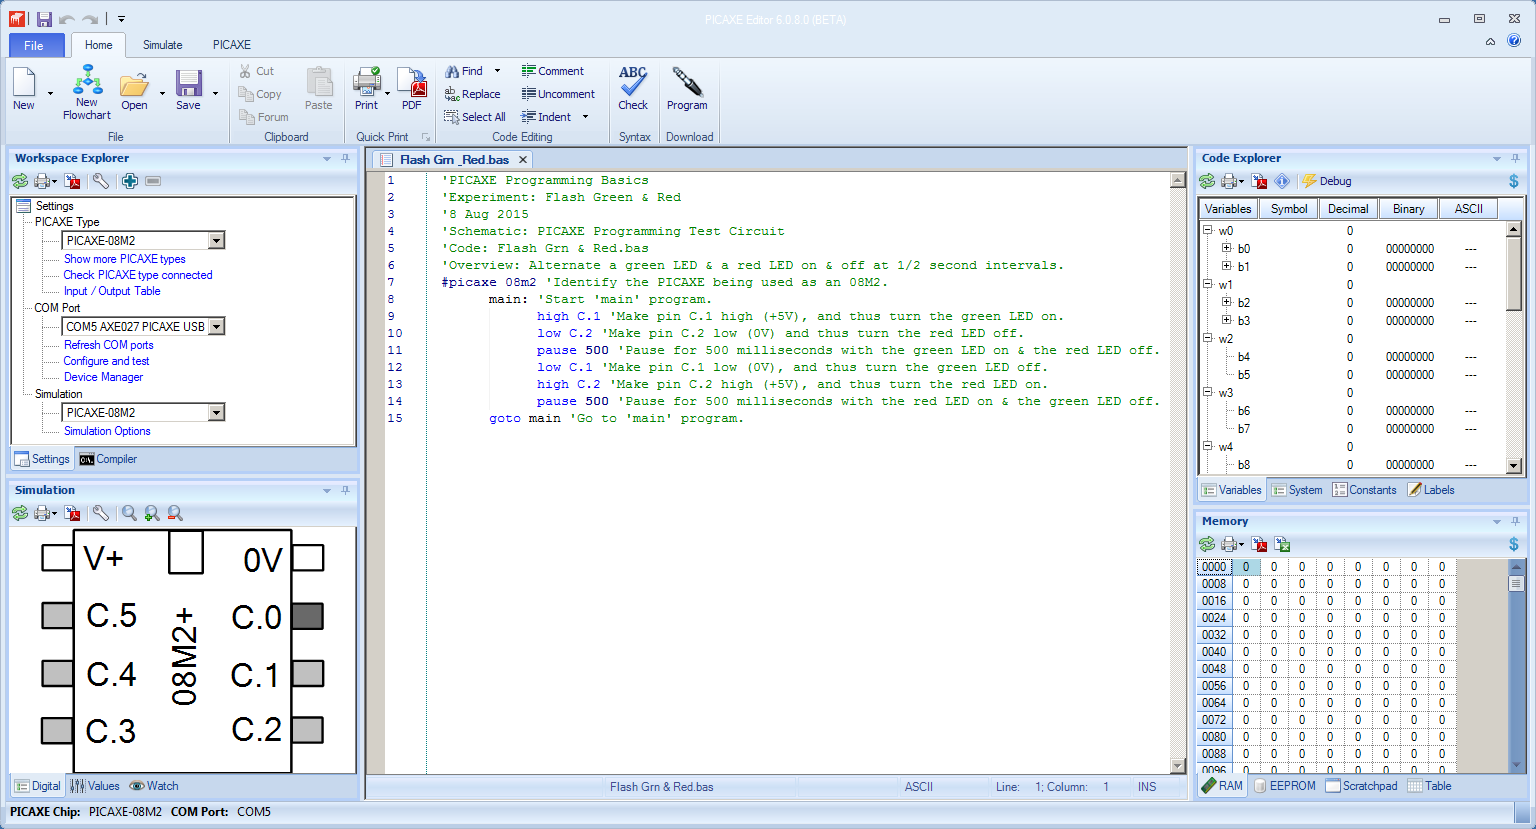
In the PICAXE world, the metal leads that extend from the sides of each PICAXE chip are not called "pins," but are called "legs." The term "pin" is reserved to identify which of the legs are inputs and/or outputs to the µC. The Simulation pane in the figure above shows a PICAXE-08M2+ with the pins identified by a letter and a number: C.0 - C.5. The "legs" are counted starting with leg 1 being V+, and increasing in a counter-clockwise direction to leg 8 which is designated 0V. Note that pin designations are included in the code, but leg numbers are not.
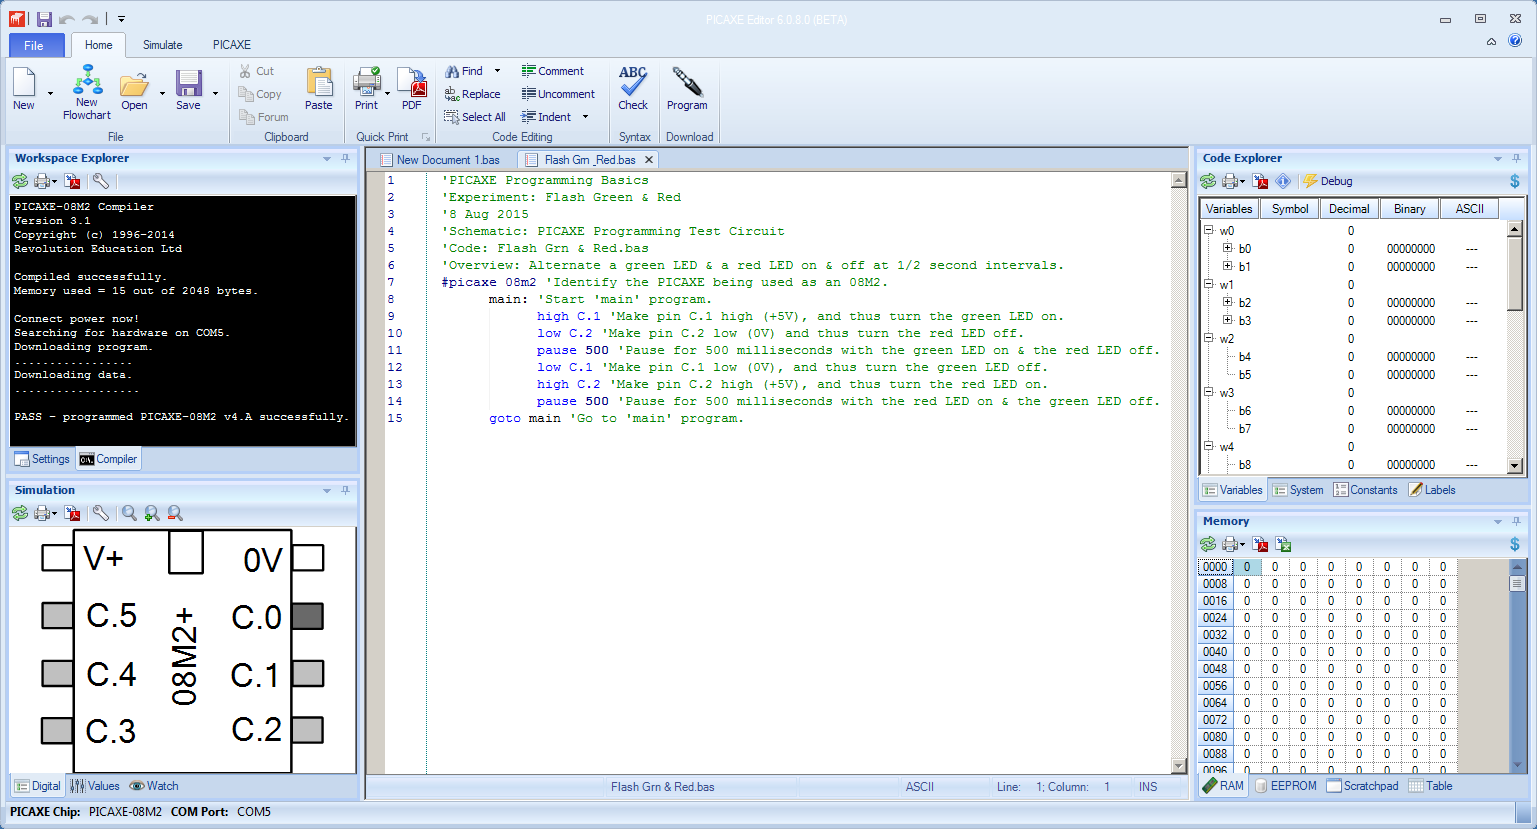
Finally, the big moment has arrived; it's time for you to program your first PICAXE with PE6, and after good preparation it's simple. Just click the Program Download icon in the Home ribbon, and the programming will begin. The Workspace Explorer Compiler pane will display the download progress, and conclude with a program successful message as shown in the figure below. Click the image for higher resolution.
Of course, the real proof of performance is seeing the green and red LEDs alternately light at half-second intervals. You can be sure that your PICAXE programming test circuit is electrically correct, your programming cable is working as designed, and the code is doing its job. Success!
What's Next?
If AXEpad is the utility vehicle of PICAXE programming, PICAXE Editor 6 is the luxury car. Each time you drive PE6, you may discover a new button, switch, indicator, or feature. This article has barely begun to explore its capabilities, most of which are described in the PE6 Beta Testing Briefing document available here. Check out the extensive manuals and other PICAXE support resources by clicking the tiny question mark icon in the top right corner of the PE6 screen.
Meanwhile, try your hand at modifying and improving the Flash Grn & Red.bas code. You can change the timing and pattern of the flashes, add a yellow LED and 330 ohm resistor to pin C.4, and include it in the flash pattern, or even write the code to make the LEDs duplicate the on and off patterns of a traffic light. Feel free to experiment with the code. The worst that can happen is that it stops running, in which case, you can simply reload the original code, and resume your experiments.
The more you do with a PICAXE, the more ideas you will have for putting it to work, or just for play.
Next Article in Series: Writing PICAXE BASIC Code - Part 1
Related Content