 Facebook
 Google
 GitHub
 Linkedin
CAT-apult… An Arduino-Controlled Servo for Makers!
The CAT-apult! is the robotic food launcher your cat never knew it needed.
The CAT-apult! is the robotic food launcher your cat never knew it needed.
The CAT-apult! is a simple setup introducing you to the basics of servo motors and analog inputs, which can also be easily implemented in a variety of projects. It utilizes an Arduino Uno and just a few inputs and outputs to keep your cat stuffed.
BOM:
Hardware:
- Arduino Uno w/ USB cable
- Computer with Arduino IDE
- Micro Servo
- Force Sensitive Resistor (FSR)
- Pushbutton
- 10k resistors (x2)
- Catapult
Software:
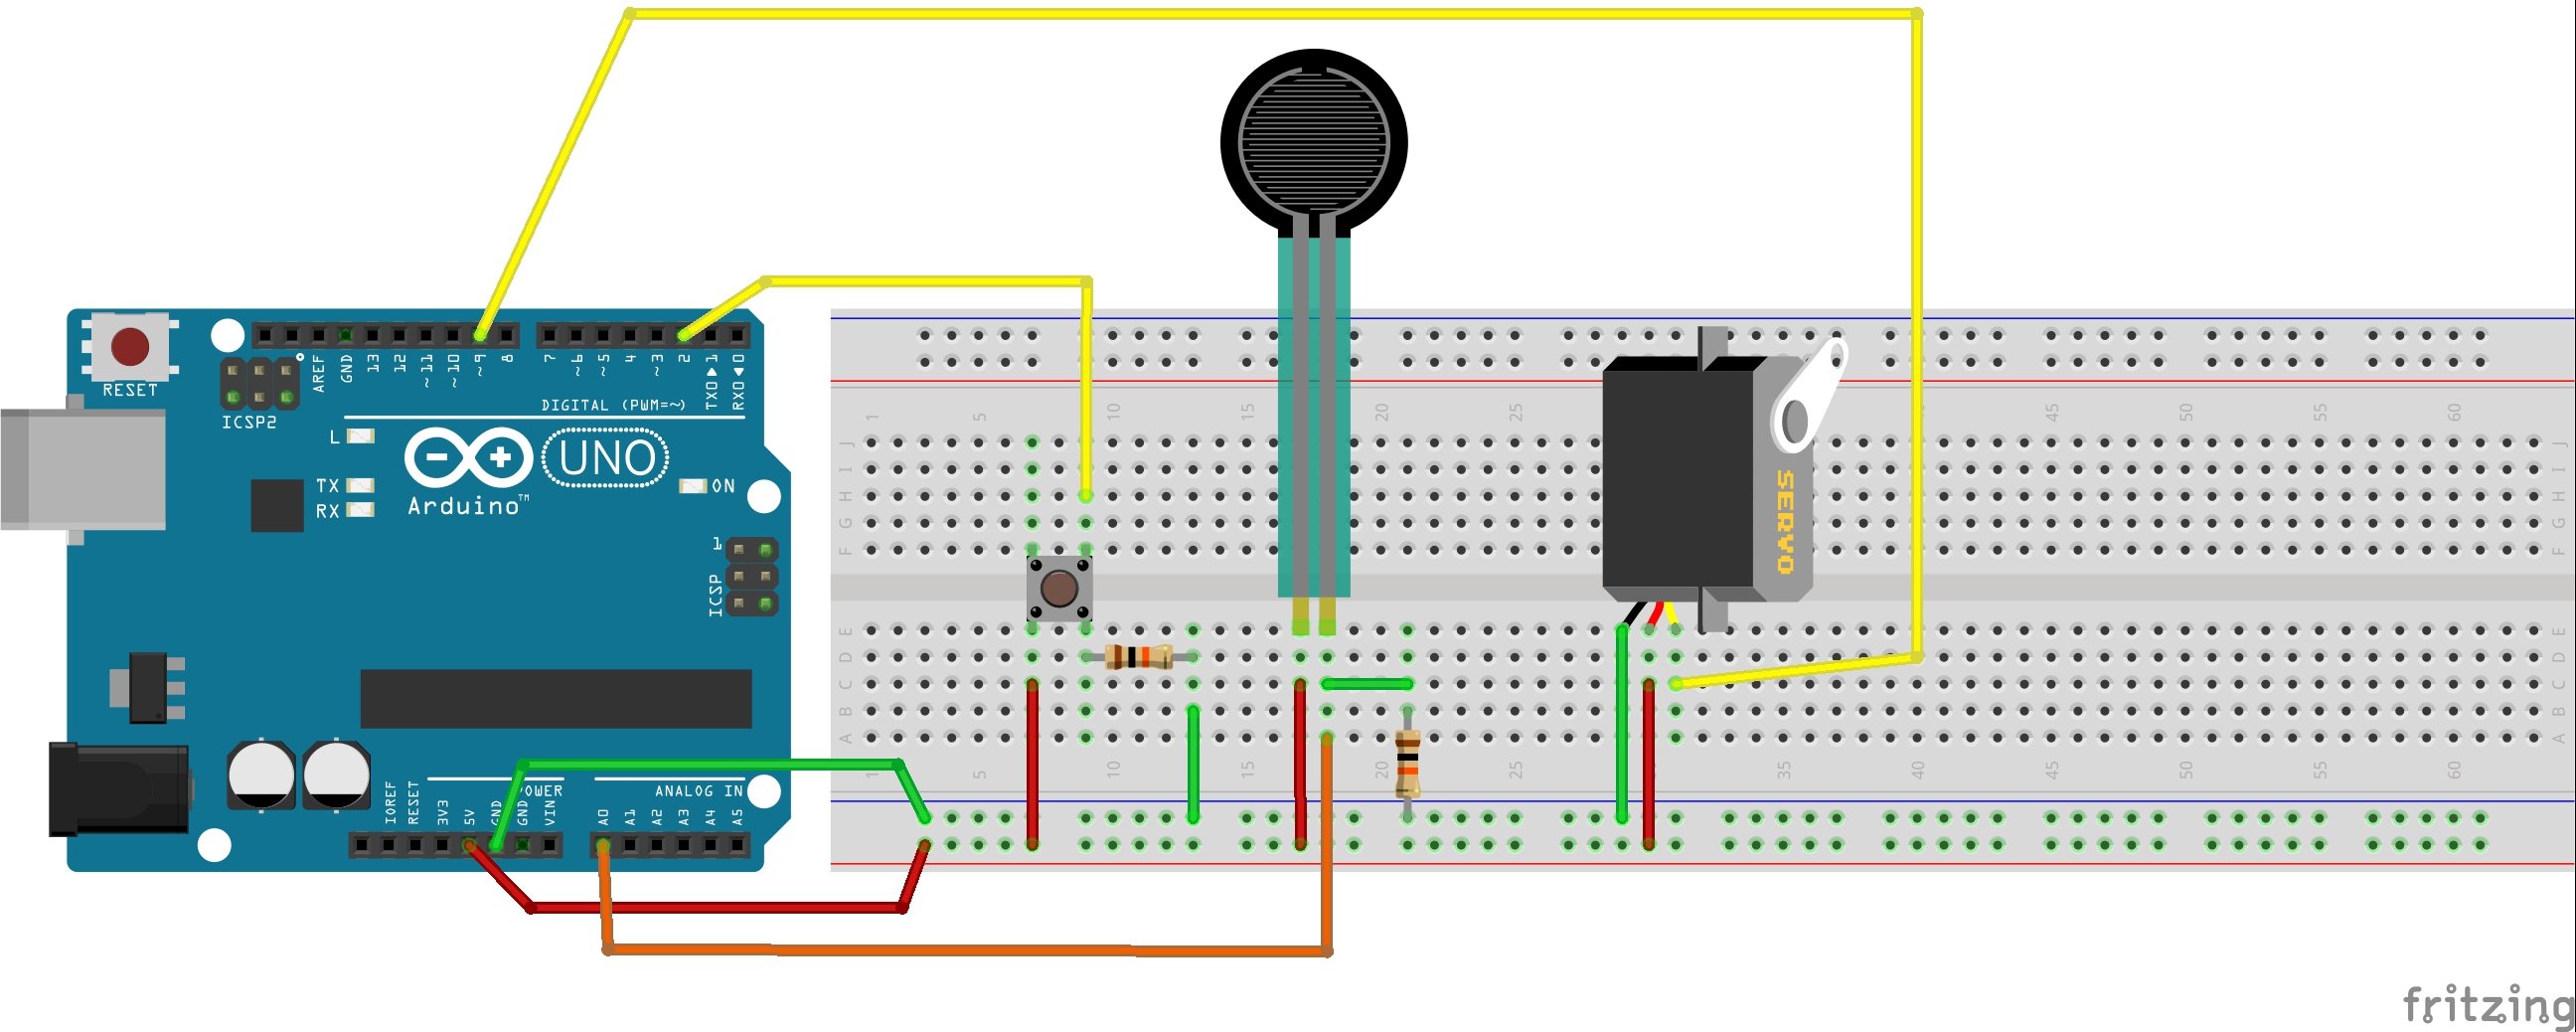
CAT-Apult! diagram made with Fritzing
Why?
We all know how petty cats can be: “Feed me! Love me! Now let me ignore you!” My feline friend, Olive, was always begging for more food in his bowl when there was already plenty there! Well, one day I had enough and built a contraption designed to launch more food at him every time he was hungry.
How?
Attention: For best practices, when using any type of motor, always power your Arduino or device from an external source. Do not power from a USB connection.
The design utilizes both an Arduino Uno with Servo Control as well as its analog input to read our FSR value which controls the servo.
To clarify how servos work, when I say the servo starts in "the spot of zero," what I mean is the servo's neutral position. As shown in the diagram below, with a 1.5ms pulse width applied to the control line, the servo sits at the neutral position—in this case identified as 90º. When the pulse width increases or decreases, the servo moves towards 180º or 0º, respectively. You could also describe the neutral position as 0º, in which case the servo's angular range extends from -90º to +90º. Our servo should move 90º (not 110º as stated in the video).

Diagram courtesy of Servo City
We have initialized our serial monitor so that we can read the values of our FSR and adjust our kitty-threshold accordingly. Once satisfied with our threshold value, we can turn our servo to lock the CAT-apult! by pressing our pushbutton. When the cat puts its weight on the FSR, the servo will move back to the neutral position, thus launching the cat food.

CAT-apult! in action!
Breakdown:
In theory, your Arduino code will do the following:
- Read the analog input and compare it to your threshold range
- Read the button input and move your servo accordingly
- Move the servo back to the neutral position when the threshold value is met
Code:
// Written by Ryan Jones for All About Circuits.

#include

const int buttonPin = 2;  //button used to move servo to lock position, attached to digital input 2
int pressurePin = 0; // pressure sensor to trigger release of catapult, attached to analog input 0
int buttonState = 0;  //initial state of button
int threshold=70; //threshold value of sensor at which the catapult launches (change this to fit your needs)

Servo myservo;  // create a servo object to control a servo
int position = 0; //servo starts at neutral position


void setup() {

  Serial.begin(9600); //display serial input (reads pressure sensor value - adjust threshold accordingly)
  pinMode(buttonPin, INPUT); //make the button pin an input pin
  myservo.attach(9); //servo attached to pin 9 to hold/fire catapult

}

void loop() {

  buttonState = digitalRead(buttonPin); //read value of button
  pressurePin=analogRead(pressurePin); //read value of pressure sensor

  if(buttonState == HIGH) { //if button pressed...
    myservo.write(90); //...move servo 90 degrees (change this number to fit your personal use)
  }

  if(pressurePin > threshold) { //if pressure sensor value is above threshold...
    myservo.write(0); //...move servo back to neutral position
  }

}
Catapult_Arduino_Sketch.ino.zip
Strategically place your catapult so that your cat doesn’t see what’s coming! Now you can sit back and enjoy the creation that will inevitably lead to a messy floor and an angry cat.
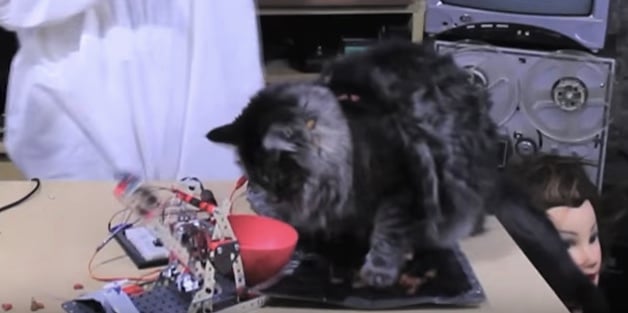
Olive's favorite part!
Credits:
Special thanks to Bensound for the music!
Other MIT-i innovations:
- The Launchpad-Based Laser Tripwire Alarm! (A launchpad security system)
- The Universal Remote Control! (An Arduino-based IR controller)
Give this project a try for yourself! Get the BOM.
Related Content


Don’t have a cat, only a wife and you bet I wouldn’t feed her THAT way ;p but anyway: interesting intstructable, I learnt three things:
1 how to use a servo
2 how to use a pressure sensor
3 learning can be A HUGE LOT of FUN. And teaching too, I suppose.
I enjoyed this, especially the video, ROFLMAO!!!
Nice! Any details on the balloon for the FSR?