How to Communicate with a Custom BLE using an Android App
September 18, 2015 by Travis FagernessLearn how to communicate with a custom BLE peripheral using an Android device.
This article demonstrates how to communicate with a custom BLE peripheral using an Android device. This application can be adapted to add BLE capabilities to other devices by connecting a nRF capable device to them.
Overview
This is part of a series of articles on the nRF51. The nRF51 is a system-on-chip with a Cortex M0 and a BLE radio chip all in one. This article demonstrates how to communicate to a custom peripheral from Android.
Previous articles:
BLE using nRF51: ARM-GCC Build Environment
How to Communicate with a Custom BLE using an Android App
Requirements
- Device that has the nRF51
- Used in article: nRF-Dongle
- Programmed with the application from the article on custom BLE peripheral
- Android device capable of BLE
- Java JDK 7
- Used in article: 7u79
- Android Studio
- Use in article: 1.3.2
Installation
Java JDK 7
Download the JDK for your operating system and follow the on-screen instructions to install.
Android Studio
Download the installer for your operating system and follow the on-screen instructions to install.
Create a new project
Open Android Studio and you should be greeted with the following screen.
Select Import an Android code sample. On the next screen select the sample Bluetooth Le Gatt under Connectivity. This project will set us up with a framework to build off of for our application. The sample application has the ability to scan for devices, connect, and display information about services and characteristics.
Name the project what you'd like. I kept it the same name as the default.
Click Finish. The project will now load.
Working with a project
The IDE may seem overwhelming at first, it has many features.
Let's go through a few of the key features that we need to create a custom application based on this example.
File Browser
The file browser has many categories and displays each file in the projects. The manifests are xml files that setup the project and tell the OS what behaviors and features the application will require. The java folder contains the actual code for the application. The res folder contains the resources, such as the graphical layouts, menus, and values used throughout the application. Values can be strings, arrays, colors and much more. They are used throughout the application code instead of hard coding values.
Layout View
The layout view is automatically opened if the layout file is opened. The layout can be modifed directly by changing to the text view by clicking on the bottom in the bottom left. Remember this because it will be much easier to copy the code in the next section to create a layout.
Java View
If you open one of the java files, a standard text editor will open.
Creating a layout with buttons
We're going to add two buttons to the application that will allow us to read and write the custom characteristics that were created. To do this, we have to create a new layout file by right clicking the layout folder > New > Layout resource. A new window will open to setup some options, leave them as the defaults. Set the name to "button_control". You should now see a new file called "button_control.xml" under the layout folder.
Click the "Text" button on the bottom left to view the XML file itself. Paste the following code into the file button_control.xml.
<?xml version="1.0" encoding="utf-8"?>
<LinearLayout xmlns:android="http://schemas.android.com/apk/res/android"
android:orientation="vertical"
android:layout_width="match_parent"
android:layout_height="match_parent">
<Button
android:layout_width="match_parent"
android:layout_height="wrap_content"
android:text="Write Char"
android:id="@+id/button2"
android:onClick="onClickWrite" />
<Button
android:layout_width="match_parent"
android:layout_height="wrap_content"
android:text="Read Char"
android:id="@+id/button"
android:onClick="onClickRead" />
<TextView
android:layout_width="wrap_content"
android:layout_height="wrap_content"
android:text="@string/no_data"
android:id="@+id/data_value" />
</LinearLayout>
You should see two buttons on the example phone and some text that says "No data". This text field will be used to display the characteristic data.
Add read and write function to BluetoothLeService
In order for the buttons to do anything, we have to modify the BluetoothLeService file to be able to read and write the custom characteristics. Add the following two functions after the function titled getSupportedServices() around line 314. These functions have hard-coded UUID's that were created in the BLE peripheral project.
public void readCustomCharacteristic() {
if (mBluetoothAdapter == null || mBluetoothGatt == null) {
Log.w(TAG, "BluetoothAdapter not initialized");
return;
}
/*check if the service is available on the device*/
BluetoothGattService mCustomService = mBluetoothGatt.getService(UUID.fromString("00001110-0000-1000-8000-00805f9b34fb"));
if(mCustomService == null){
Log.w(TAG, "Custom BLE Service not found");
return;
}
/*get the read characteristic from the service*/
BluetoothGattCharacteristic mReadCharacteristic = mCustomService.getCharacteristic(UUID.fromString("00000002-0000-1000-8000-00805f9b34fb"));
if(mBluetoothGatt.readCharacteristic(mReadCharacteristic) == false){
Log.w(TAG, "Failed to read characteristic");
}
}
public void writeCustomCharacteristic(int value) {
if (mBluetoothAdapter == null || mBluetoothGatt == null) {
Log.w(TAG, "BluetoothAdapter not initialized");
return;
}
/*check if the service is available on the device*/
BluetoothGattService mCustomService = mBluetoothGatt.getService(UUID.fromString("00001110-0000-1000-8000-00805f9b34fb"));
if(mCustomService == null){
Log.w(TAG, "Custom BLE Service not found");
return;
}
/*get the read characteristic from the service*/
BluetoothGattCharacteristic mWriteCharacteristic = mCustomService.getCharacteristic(UUID.fromString("00000001-0000-1000-8000-00805f9b34fb"));
mWriteCharacteristic.setValue(value,android.bluetooth.BluetoothGattCharacteristic.FORMAT_UINT8,0);
if(mBluetoothGatt.writeCharacteristic(mWriteCharacteristic) == false){
Log.w(TAG, "Failed to write characteristic");
}
}
Add read and write function to DeviceControlActivity
The BluetoothLeService is just the underlying class that abtracts some of the BLE Android functionality. In order to actually do anything from the UI, some modifications have to be done to the file DeviceControlActivity. Add the following two functions to the end of the class just after makeGattUpdateIntentFilter(). These functions just call the two functions that were added to the class from before. The onClickWrite() function writes the value 0xAA to the characteristic, but this could be modified to any value you wish. The read function triggers a read request to the operating system. When the read is complete the data is transfered through an intent which is read from mGattUpdateReceiver with the action ACTION_DATA_AVAILABLE. Intents and actions are a feature of Android and are beyond the scope of this article.
.
public void onClickWrite(View v){
if(mBluetoothLeService != null) {
mBluetoothLeService.writeCustomCharacteristic(0xAA);
}
}
public void onClickRead(View v){
if(mBluetoothLeService != null) {
mBluetoothLeService.readCustomCharacteristic();
}
}
Modification to DeviceControlActivity
The class as written will try to access some UI features that don't exist in the layout we created. To ensure the application doesn't crash, some lines have to be commented out. We also have to start the layout that we created.
Function mGattUpdateReceiver
Comment out line 109:
//displayGattServices(mBluetoothLeService.getSupportedGattServices());
Function clearUI
Comment out line 151:
//mGattServicesList.setAdapter((SimpleExpandableListAdapter) null);
Function onCreate
Comment out the UI references. Keep the reference to mDataField. Change the setContentView function to load the button_control layout.
@Override
public void onCreate(Bundle savedInstanceState) {
super.onCreate(savedInstanceState);
setContentView(R.layout.button_control);
final Intent intent = getIntent();
mDeviceName = intent.getStringExtra(EXTRAS_DEVICE_NAME);
mDeviceAddress = intent.getStringExtra(EXTRAS_DEVICE_ADDRESS);
// Sets up UI references.
/*
((TextView) findViewById(R.id.device_address)).setText(mDeviceAddress);
mGattServicesList = (ExpandableListView) findViewById(R.id.gatt_services_list);
mGattServicesList.setOnChildClickListener(servicesListClickListner);
mConnectionState = (TextView) findViewById(R.id.connection_state);
*/
mDataField = (TextView) findViewById(R.id.data_value);
getActionBar().setTitle(mDeviceName);
getActionBar().setDisplayHomeAsUpEnabled(true);
Intent gattServiceIntent = new Intent(this, BluetoothLeService.class);
bindService(gattServiceIntent, mServiceConnection, BIND_AUTO_CREATE);
}
Function updateConnectionState
Remove line 235:
//mConnectionState.setText(resourceId);
Testing the App
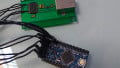
First, make sure the peripheral is turned on and advertising. Download the application by connecting your phone to the PC and clicking the green arrow. A window will pop-up to choose the device to run on. If you don't see your device, you may need to install ADB drivers and set your device to USB debuggable. This is different for every device.
The application will open on your phone. It will automatically begin scanning. Select the "Custom BLE" peripheral. Now you can read and write data by pressing the buttons. When you write, you can see the data on the UART console. When you read, you can see data on the phone increasing by a value of 1 every second. The data is displayed as ASCII text and the raw byte values.
Here I pressed the button read char and can see the data values of 0x6A which is 'j' in ASCII.
Conclusion
This article demonstrated how the BLE example in Android Studio can be modified for whatever UUID you have. This application can be adapted to add BLE capabilities to other devices by connecting a nRF capable device to them. This could be through GPIO, SPI, UART, or I2C. Future articles will show some examples of doing this. Have fun!
Give this project a try for yourself! Get the BOM.
Great little tutorial just what I’ve been looking for. I’m still struggling to understand the UUID protocol.
Hello,
I have a problem with the “write” and “read”-function. I can easily connect to my intel edison but if i want to write something there is no reaction at the application. There is no keyboard as well. Does anybody know how to fix this problem?
I am working on a Sony Xperia Z1.
The device i want to commiunicate with is an intel edsion.
I hope anyone can help me!
Thank you
I’m confused about the read chars button? It read what you wrote back from vterm-hmsoft module to the android phone?
I was able to connect to the module but when I click on either button I get this error in the logcat and nothing in the terminal or the android device screen: com.example.android.bluetoothlegatt W/BluetoothLeService: Custom BLE Service not found. Prior to this I DO get Connected to GATT server, the right device is listed, services discovered and characteristics as well.
I wish I could go back and erase my previous posts 😊. I was able to get the write to work bychanging the write characteristic to the second option. Ok so that works but all I get is this in the logcat:
04-11 16:55:57.820 15504-15504/com.example.android.bluetoothlegatt D/BluetoothGatt: readCharacteristic() - uuid: 00002a00-0000-1000-8000-00805f9b34fb
04-11 16:55:57.879 15504-15517/com.example.android.bluetoothlegatt D/BluetoothGatt: onCharacteristicRead() - Device=74:DA:EA:B2:87:AE UUID=00002a00-0000-1000-8000-00805f9b34fb Status=0
04-11 16:56:15.767 15504-15504/com.example.android.bluetoothlegatt D/BluetoothGatt: writeCharacteristic() - uuid: 00002a02-0000-1000-8000-00805f9b34fb
04-11 16:56:15.840 15504-15518/com.example.android.bluetoothlegatt D/BluetoothGatt: onCharacteristicWrite() - Device=74:DA:EA:B2:87:AE UUID=00002a02-0000-1000-8000-00805f9b34fb Status=128
but I dont understand how I can send to the bt module with this.
Could you help me make the final connection?
Hi,
I have a cc2650STK. Im trying to connect my device but it isnt shown . Help me please
Hello, thank you very much: great tutorial! Could please help me? I have a proble with read function: i can write from android app to ARDUINO but I can not read information sent from ARDUINO to ANDROID APP. I changed the 3 UUID that you wrote inside the GATT SERVICE and teh GATT CHARACTERISTICS:
mCustomService
mReadCharacteristic
mWriteCharacteristic
I have this message from ANDROID: “Failed to write characteristic”. I do not change nothing inside the class SampleGattAttribute. I follow step by step you tutorial: I do not understand what I wrong.
Thank you in advance.
Hi how we can communicate application bluetooth chat with a BLE custom
Hello,how can I write a binary file to the Custom BLE?
Hi,
i run the code and i have no errors but when i try to read or write nothing appens. Seems like the buttons dosent exist.
How can i fix this? urgent.
Thanks.
Thanks for the code,
But I can’t write the characteristics to the device.
if (mBluetoothGatt.writeCharacteristic(mWriteCharacteristic)) {
Log.w(TAG, " Write characteristic");
} else {
Log.w(TAG, "Failed to write characteristic");
}
//I will getting in to else part always….
Hi, I’m trying to connect via BLE 4.2 from my android device (android-6.0) to my EDK-NINA-B112 (a Development kit for the NINA-B112, which uses a nRF52832 chip). When I use the code of the tutorial, I get to the “scanning screen”, but I do not find any bluetooth devices at all. If I try using apps on the Google play store, I do however find my bluetooth device, and I can easily connect and send messages from and to the device.
Is it a problem on the code site not supporting some of these components I just have been describing? Or might it be a problem between the android studio compiling and debugging on my phone?
I can debug the code, put breakpoints in the scanning function, and it goes into the scanning function as it should, but it does not find any devices. I have also tried just running the app one the phone without debugging ofc.
Very nice example!
I just started to learn to program my Android phone so please be gentle 😉
How do I modify the example, so my phone sends one byte when I press the Write-button, and another when I release it again ?
Jens
Very nice exmaple. I can connect but i failed to wirte data to my Genuino 101. I revice the Message:
10-27 14:30:48.070 12369-12369/com.example.android.bluetoothlegatt W/BluetoothLeService: Custom BLE Service not found
in my log.
Can somebody help me with this ?
Very nice exmaple. I can connect but i failed to wirte data to my Genuino 101. I revice the Message:
10-27 14:30:48.070 12369-12369/com.example.android.bluetoothlegatt W/BluetoothLeService: Custom BLE Service not found
in my log.
Can somebody help me with this ?
i have followed the same procedures but im getting this error after connecting to my ble modudle java.lang.RuntimeException: Error receiving broadcast Intent { act=com.example.bluetooth.le.ACTION_GATT_CONNECTED flg=0x10 }. can anyone suggest me the solution.
Thanks for the help.
I am able to read some characteristics but some of them I am not able to.
I am working with TI cc2541 development kit.
Can anyone tell me why am I not able to access them.
How to search BLE device related to particular UUID in android?Suppose we want to search BLE device based on UUID. I am using startLeScan(uuid[],lecallback) but not getting result.
Hello,
Great totorial,
but it wiil give on log cat.“Custom BLE Service not found”
what should I do??
Please help me.
Thanks
Hi.. May I ask how I can scan for a specific BLE peripheral instead of returning a list of all peripherals nearby? and connect to it? Thanks…
Hi, my name is Nick and I have implemented this BluetoothLeGatt code in my Android Studio. It shows no errors. So I click run. It finishes with message: “Gradle Build successful”. I then can see the ADB and can choose. First time I had the Nexus 5X with API 22 on it. It ran the application but failed to load the UI on the virtuell device. Toast message: BLE not supported. Seconde Toast message: Bluetooth not supported. That is the Nexus 5X API 22 in Android Studio on Win10 Home edition. So the virtuell device loads but I can’t really do anything with it. I then chose to load the app on my real Android Phone the OneplusOne which started out with KitKat 4.4.4 but got upgraded twice and is now running Marshmallow 6.0.1. Its loading the app on the phone but it doesn’t show the UI with buttons on it. Like your phone is showing: Write Char, Read Char, no data. That is not showing on the virtuell device nor on my real phone. It does show the top menu Bar with the BLE logo on the left. To the right it shows the scan button. I can click it but it won’t find my Bluetooth device. The BLE device is from Adafruit, the Feather 32u4 with the Nordic chip nRF51822 on it (https://learn.adafruit.com/adafruit-feather-32u4-bluefruit-le/overview). Again, on my real phone it won’t show the UI with the 2 buttons on it either. The build on the real phone is successful but with those Notes:
Note: C:\Users\NickH\AndroidStudioProjects\BluetoothLeGatt_writing_reading\BluetoothLeGatt_writing\Application\src\main\java\com\example\android\bluetoothlegatt\DeviceScanActivity.java uses or overrides a deprecated API.
Note: Recompile with -Xlint:deprecation for details.
Note: C:\Users\NickH\AndroidStudioProjects\BluetoothLeGatt_writing_reading\BluetoothLeGatt_writing\Application\src\main\java\com\example\android\bluetoothlegatt\SampleGattAttributes.java uses unchecked or unsafe operations.
Note: Recompile with -Xlint:unchecked for details. And on the very buttom on the right pane it shows this message:
BUILD SUCCESSFUL
Total time: 22.369 secs
On the left pane in Android Studio it shows these messages:
E/BluetoothAdapter: Bluetooth binder is null and those messages:
W/EGL_emulation: eglSurfaceAttrib not implemented
W/OpenGLRenderer: Failed to set EGL_SWAP_BEHAVIOR on surface 0xb429fc40, error=EGL_SUCCESS
W/EGL_emulation: eglSurfaceAttrib not implemented
W/OpenGLRenderer: Failed to set EGL_SWAP_BEHAVIOR on surface 0xb429fc40, error=EGL_SUCCESS
So the conclusion:
None of the chosen Virtuell devices loads the app in Android Studio.
The app is loding on my real phone but no UI buttons are showing.
I get those messages on the left window pane in Android Studio when running on my real phone:
W/Binder: Caught a RuntimeException from the binder stub implementation.
java.lang.SecurityException: Need ACCESS_COARSE_LOCATION or ACCESS_FINE_LOCATION permission to get scan results
at android.os.Parcel.readException(Parcel.java:1620)
at android.os.Parcel.readException(Parcel.java:1573)
at android.bluetooth.IBluetoothGatt$Stub$Proxy.startScan(IBluetoothGatt.java:772)
at android.bluetooth.le.BluetoothLeScanner$BleScanCallbackWrapper.onClientRegistered(BluetoothLeScanner.java:324)
at android.bluetooth.IBluetoothGattCallback$Stub.onTransact(IBluetoothGattCallback.java:56)
at android.os.Binder.execTransact(Binder.java:453)
I/Choreographer: Skipped 125 frames! The application may be doing too much work on its main thread.
W/IInputConnectionWrapper: getExtractedText on inactive InputConnection
W/IInputConnectionWrapper: getTextBeforeCursor on inactive InputConnection
W/IInputConnectionWrapper: getSelectedText on inactive InputConnection
W/IInputConnectionWrapper: getTextAfterCursor on inactive InputConnection
I do have the bluetooth adapter on win10 turned on and It can see the BLE device and the blue LED on the bluetooth device is turned on to indicate a conneciton. That is never the case with your app.
Also, when I try to make a signed apk it renders the error that it can’t read the keystore or it was tampered with or the password is wrong. However, it makes an Aplication-debug.apk. But when I take it and load it on my phone it does the same thing as running it from Android Studio. It won’t show the UI buttons on it. It lets me scan but won’t find the device.
So, could you be so kind to help me to make this project work in Android Studio please?
I’m thinking that if it works on a virtuell device it will work on my phone as well. That be really nice.
Thanks,
Nick
Great Tutorial, everything is working. I just wanted to know how can i read decimal value instead of ASCII ?
Thats a great tutorial, thank you so much !! However, I have a problem with the code; you previously mentioned that the UUIDs are hard coded, in the beginning I left them as is, but I had an error of “Custom BLE Service not found”. Therefore I showed the UUIDs of my edison and changed the one which was hard coded in the getService() method and replaced it with my UUID: Generic Access Profile. So it worked and I don’t get that error anymore. However, I don’t know which UUIDs I should replace the methods which are getCharacteristic(),
UUID: PnP Information
UUID: Generic Access Profile
UUID: Generic Attribute Profile
UUID: A/V Remote Control
UUID: A/V Remote Control Target
UUID: Handsfree
UUID: Audio Source
UUID: Audio Sink
These are the list of UUIDs, so it would be great if you can help me throughout this.
The error I’m getting whenever I’m pressing the read or write button is :
Caused by: java.lang.NullPointerException: Attempt to invoke virtual method ‘boolean android.bluetooth.BluetoothGattCharacteristic.setValue(int, int, int)’ on a null object reference
I import the code by select “Import an Android code sample”, But it get a error as
Error:Failed to find target with hash string ‘android-25’ in: /Users/adsushsu/Library/Android/sdk
what is the problem! Thanks
FRIENDS…
EVEYTHING WORKS FINE, BUT THERE IS A PROBLEM.
ANYBODY CAN HELP ME PLEASE? HOW CAN I SEND AND RECEIVE DECIMAL VALUE INSTEAD OF ASCII ? (Like 1234)
I tried to send and receive normal decimal values, i played with all read and write blocks, i tried to chang string to int, but i failed after few days :-(
Many thanks for your help.
I have following error; !
Error:(344, 89) error: cannot find symbol variable UUIDcfg ?
How can I correct/define the variable UUIDcfg ?
Hi I used the same program for RN4020.
It is connected but unable to read and write..why?
How to make it work?
plz help..
Oh boy, the amount of fiddling you need to get this to work on Android studio 3.* ...
Still not ready, but going at it right now ^^”
Hi.
I’m trying to send data from my wearable device pushing a button to send a value to my phone but when I push the button I get the following error:
E/bt_btif: bta_gattc_process_indicate, ignore HID ind/notificiation
Do you know how to solve it?
Thank you in advance.
Regards!
Hi, your tutorial helped me a lot, but I do not have any experience with BLE as I can send the value “0x00100000001” since it tells me that the value is very long
Service UUID.fromString(“00002b03-0000-1000-8000-00805f9b34fb”)
Am not able to write to some characteristics. I need first write password, 0x666666, to write to some characteristics. However, writing the password disconnects me.
Below is my service code:
https://pastebin.com/VGMnkiKA
I’ve been stuck on this for awhile, any help would be greatly appreciated. Thanks.
Indeed a great tutorial! However, I like to download the code but the link is invalid. Anyone who has a valid link?