 Facebook
 Google
 GitHub
 Linkedin
Building a Capacitive Touch Interface with the Texas Instruments MSP430FR2633
The MSP430FR2633 is a low-power microcontroller with multiple GPIOs and capacitive touch pins. This project creates a circuit that supports a custom capacitive touch panel with LED and haptic feedback.
Learn how to design a circuit that supports a custom capacitive touch panel with LED and haptic feedback.
The MSP430FR2633 is a low-power microcontroller with multiple GPIOs and capacitive touch pins. This project creates a four-button and four-ring slider capacitive touch circuit with LED and haptic feedback.
In this article, I will lay out the circuit's features, connections, and hardware. I'll also share a glimpse into the complications of getting a custom circuit board fabricated, which should be helpful for those of you who work with DipTrace or anyone who wants to better understand how Gerber files are generated.
Let's get started.
About the Circuit
This design is built around three integrated circuits: the Texas Instruments MSP430FR2633IDA is the central microcontroller; the Silicon Labs CP2102N provides a USB-to-serial interface; and the Texas Instruments DRV2605L provides haptic feedback.

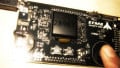
Shown above are two versions of the control interface. The right design is shown to illustrate pad design and placement, but would not be used in a final design due to potential ESD damage to the control IC
The Microcontroller
TI’s MSP430FR2633 is an ultra-low-power capacitive touch sensing microcontroller. In addition to typical microcontroller capabilities, such as multiple timers, ADC, serial interface, etc., this chip supports up to 16 capacitive touch pins that can be configured to make custom buttons and sliders for user interfaces.
Capacitive touch buttons have the advantage of having no moving parts that can fail, and they can be hermetically sealed for use in harsh environments.

The MSP430FR2633 has dedicated and multipurpose GPIO and capacitive touch pins
In this design, the GPIO and capacitive touch pins are connected to female headers for off-board connections. Four three-pin headers are used with shunts to selectively enable and disable I2C and onboard LEDs; the LEDS are only useful for initial programming and testing, as they will be buried beneath a second circuit board with a control interface in the final assembly. The SCL and SDA disconnect allow for the selective testing and enabling of the haptic feedback circuit during prototyping.
Programming the MCU

Off-board connectors provide access to GPIO and capacitive touch pins
Programming of the MCU can be accomplished with a JTAG programmer connected to either a tag-connect or a standard 14-pin JTAG connector.

JTAG programming is via a 14-pin connector or 10-pin TagConnect
The tag-connect has the advantage of being a zero-cost addition to any circuit board. Unfortunately, it requires users to have a $40 adapter for their JTAG programmer, which is why I included a standard interface as well.
Power Input, Regulation, and ESD Protection
A USB jack connector is available to power the circuit. ESD protection is provided on the USB D+, D-, and Vbus lines.

Schematic sections showing power input and ESD protection
The USB-to-serial chip used in this circuit has a built-in 100 mA regulator that is used to provide power for the rest of the circuit. Two sets of 0.1 μF and 4.7 μF capacitors are used, in accordance with datasheet recommendations (one pair for VDD and one pair for VREGIN).

Two sets of 4.7 uF and 0.1 uF capacitors are used per datasheet recommendation
Haptic Feedback and LED Indicators
The DRV2605 is an I²C-controlled motor driver that is pre-programmed with 100 different vibration effects.
Unlike traditional switches, capacitive touch buttons and sliders provide no physical feedback to users. Lack of feedback can lead to confusing or even dangerous situations. Including this driver and an eccentric motor allows users to know that their input has been detected.

In addition to haptic feedback, several LEDs are included in the circuit to provide visual feedback. D3 and D4 are connected to GPIO pins by shunting headers J203 and J205; D5 indicates that the board is powered; D6 and D7 are used to indicate serial data transfer between the MCU and the USB-to-serial converter.
As I mentioned earlier, all of these LEDs are for testing and will be hidden in the final design beneath the control panel. Five visible LEDs are included on the control panel in the center of the capacitive-touch buttons.

Multiple LEDs are used to provide feedback during initial testing
You can see the LED indicators at work in the video below:
USB-to-Serial Converter
The CP2102N from Silicon Labs is the latest iteration of their low-cost, multipurpose USB-to-serial converters. It provides a bridge between a computer’s USB port and an MCU that communicates with a host program. This version of the board does not support programming of the MSP430 via USB.

Schematic section showing the USB-to-serial converter IC
Configuring the Touch Panel
Texas Instruments provides the CapTIvate Design Center, which allows users to configure their design to include their target microcontroller and capacitive touch buttons and sliders. This design uses four buttons and a custom four-pad slider.
I created the slider sawtooth rings from arc-primitives and based them on an assumed minimum finger contact diameter of 4mm. The radius of each circle increases by 4 mm, and the sawtooth circles have a minimum separation of 4mm. Each pad has a 75% circular overlap with neighboring pads.

This image shows the dimensions used to create the circular-slider ring. The sawtooth-shaped segments have a radius that increases by 4mm and terminates in the sectors defined by the equations above.
The button pads were created to provide a large surface with a carve-out to stay away from the circular ring slider.
All of the pads and the circular slider will be hidden beneath the solder resist of the control panel circuit board. This is necessary to provide ESD protection for the IC pins that are connected to the pads.

This render from OSH Park shows the copper layer of the capacitive touch buttons and circular-slider ring.
A Word about Fabricating Circuit Boards—And a Lesson about Gerber Files
I had a good deal of trouble getting this top control board ordered from a variety of fabrication houses.
The issue—as troubleshot, explained, and solved by Dan Sheadel from OshPark—is as follows:
Gerbers are drawn with simple ‘apertures’. [Similar to] paintbrushes, [they are] basic shapes used to define parts that are affected during production. Most of the time, Gerbers use a couple ‘primitive’ apertures, typically circles, rectangles, ovals, and simple regular polygons. However, they also have a way to define ‘macros’, which are a custom collection of primitives. This allows you to define a custom pad shape that is a collection of smaller primitives and then use it like any other aperture. With the vast majority of tools, this is no issue. One of the primitives you can add to a macro is a ‘polygon’, where you define the outline and anything inside of it is filled in.
Where DipTrace gets into trouble is that its polygons are wildly complex, even for basic shapes. This is because it draws arcs as simple straight lines, and so the arc approximation must have hundreds of tiny lines in order to correctly define the shape.
A good example is a rounded rectangle. Most tools define this as four circular lines around [the corners] of the perimeter and a small rectangle to fill in any gaps inside. Diptrace, however, defines it as a 200+-point polygon, meticulously detailing a line approximation around each corner.
Sadly, GerbV does not handle this well. GerbV has a 100-point limit on its polygon macro commands because each one is statically allocated [in its old C source code] rather than using the allocation specification in the macro command, itself. This is frustrating because the Gerber spec requires that polygon macros can be up to 5000 points.
The solution is to take the polygon definition out of the macro and make it part of the normal Gerber drawing, itself. GerbV has no problems with it there.
Thank you to Dan for his lending his expertise here.
Button Software Configuration
Once designed, the buttons and circular slider can be configured via the CapTIvate design center. The buttons are configured as four self-capacitive channels (4 Rx), and the wheel slider is configured as four self-capacitive channels (4 Rx).

Screen capture of TI’s CapTIvate Design Center showing the initial configuration for this project.

Use the Configure Connections to assign the buttons and wheel to the correct channels.
Conclusion
This article has discussed the design and fabrication a capacitive touch sense control board built around the MSP430FR2633. A particularly troublesome (though interesting) fabrication difficulty was related to the fact that many manufacturing houses are using free software that doesn’t meet the current Gerber specifications.
A future article will present the circuit board layout considerations as well as testing of the final circuit and the programming needed to make it work.
Related Content


Per your schematic and the data sheet examples, it looks like you are explicitly disabling the CP2012N USB-to-serial chip’s internal regulator. In your description, however, you state that you are using that regulator. Am I missing something?
Hi Mark,
I must compliment you on this article. I am an applications engineer at Texas Instruments and support the MSP430FR2633 family of CapTIvate MCUs and looking forward to your future article. I would be curious to get your opinion on the CapTIvate Design Center and the overall ease of creating, configuring and calibrating your sensors. If you any questions that I can answer for you or provide you additional information that could be helpful to the content for your future article, please let me know.
Dennis