Facebook
 Google
 GitHub
 Linkedin
Power Supplies - Applications
Video Lectures created by Tim Feiegenbaum at North Seattle Community College.
We're in section 9.2, Power Supply Applications. The reason we're looking at power supplies is because they are a major use of diodes. Nearly all computers have some sort of power supplies. Now a power supply circuit must do several things. One of them is to convert AC line voltage into a DC voltage required by the circuit. They also must reduce the AC voltage to a lower value and they must continuous adjust the DC output voltage to keep it constant under varying load conditions.
First of all this point here, we start out from the wall. We have an AC signal coming out from the wall, it is 120 volts RMS. If we looked at it on an o-scope we would see from here to here we have 170 volts peak. Now what we want for a computer circuit is we're going to want about 12 volts DC, five volts DC, maybe 3.3 volts DC, a few miscellaneous values here. This is a far cry from this. We're going to be using our power supply to do this. We're going to have a couple of aspects here. We're going to use a transformer to reduce the AC to a lower value and then we're going to use a rectifier to convert the AC into DC. We start out with the half-wave rectifier. This is the most basic of rectifiers.
Half-Wave Rectifier
The term rectify is used to describe the conversion of AC into DC. The circuits shown only one-half of the input waveform is allowed to pass through to the output. This is called half-wave rectification. We start out with an applied AC voltage and this will be the case with all of the rectifiers. We start out with an AC input and we start out with a 10-volt peak signal. If we were to draw this like this, from here to here on an o-scope we would measure 10 volts peak. Notice that we have our diode in the circuit and what is going to happen is we're showing the current flow is moving in this direction and the reason was showing it that way is because we have a positive value here and we're showing ground here.
The flow of current will be from the negative, or from ground, to the more positive value which is right here. That will forward bias our diodes. Remember our diode if we go from cathode to anode the polarity needs to be a negative to a more positive, at least .7 volts worth. That will cause this diode to conduct and it will pass this signal. We will have this AC signal passed over all of it except for the .7 volts will be passed to the output. Another way to view this and I'm going to use this throughout this presentation is to simply draw a battery over here. I'm going to put a battery with a positive on top and negative on the bottom because at this point when we're looking at this phase of the sign wave input we're on the positive cycle.
You could put a battery in here and this sometimes makes it easier to analyze a circuit of this nature because it's very clear now that we're going from a negative to a more positive. That will forward bias this diode. We've looked at the positive half of this cycle. We saw that that turned the diode on. Now when we look at the negative half of the cycle, we're coming in here, we looked at this, now we're looking at the negative half. On the negative half the polarity of this guide, remember it has to be negative to positive. On this side now we have a very negative value. We could say were going from ground to a more negative, but actually if we put that battery back in the circuit it makes a little more sense except that we turn the polarity upside down here. If we go like this and we connect the battery like this it makes a little more sense because now it's very obvious that there's a plus here and a negative here.
This diode remember that you have all the electrons over here on the cathode their going to be attracted to the positive terminal here and this will cause the depletion region to become very wide and effectively this will be an open circuit and there'll be no current flow here and there is no output.
The end result is that we have an AC signal coming in and the output we get half of it and then it cuts off. If we continued on here you'd have something that looks like this. This is what we talked about half-wave rectification.
Circuit Operation
This is a description of what we just looked at during the positive alternation the diode is forward bias and the full applied voltage has dropped across the load resistor. Here in the negative alteration the diode is reversed bias and acts like an open circuit. No voltage is present across the load resistor. The output voltage is actually pulsating DC. Looks like this.
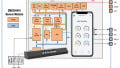
An application for a half-wave rectifier is shown on the following slide. This is from your text. This is a circuit that would recharge batteries. Now, this is a very basic one and it utilizes a half-wave rectifier. Let's look at what we have here; first of all, we have 120 volts AC applied. We have a switch and a fuse. This goes into a 12 to 1 transformer from primary to secondary. The value that's going to be fed to our rectifier … Let's take a look we have 120 volts in, 12 to 1 we're going to divide that by 12 so we'll have 10 volts RMS. Now if we were to convert that to peak, remember our formula we took .707, 10 volts RMs divided by .707 is going to yield 14.1 volts peak. Here we have this value here, now this is one of the purposes that we mentioned in this lesson was that the purpose of a power supply is to step down the high-end line voltage top a much lower value.
We use the transformer to step this down and now we have about 14.1 volts peak applied to this diode. Now, remember that in a half-wave rectifier our output looked like this. We had the humps and we called this pulsating DC. Now that doesn't really look like DC and the reason they call it pulsating DC is because it's all positive and if we were to average this value we could have an average DC level. There actually is a formula for doing this. Your text doesn't address it. I'm going to mention it briefly; you're not going to be tested on it, but just for purposes of information. This is the formula; you take voltage peak divided by pi or .318 times the peak voltage. In this case, it would be .318 times 14.1, or 14.1 divided by pi, at any rate, it's going to yield a value about 4.5 volts DC. That would be the average level delivered to this rechargeable cell over here.
Full-Wave Rectifier
A full wave rectifier applies both halves of an AC waveform to the output. The circuits shown are sometimes called a biphase half-wave rectifier and sometimes they're called a center-tapped rectifier circuit. At any rate, they employ full-wave rectification. The operation of a full-wave rectifier is demonstrated in the figures shown on the following slide. Here we have a full-wave rectifier and when we say full-wave … why don't I first describe what does that mean? Here we had an input wave coming and this is the positive, this is the negative. Now with a full-wave rectifier, the thing that we're going to get is an output, it's something that is going to look like this.
We're going to be utilizing both the positive and the negative side of the input waveform, unlike the half-wave that I was only able to use half of it. We probably ought to talk about this thing called a center-tapped. We've alluded to these in our section about transformers, but let's quickly review. Notice the secondary here is split by a ground. This is going to effectively, whatever the voltage is in the secondary, is going to be cut in half. This is one of the inherit disadvantages of a full-wave rectifier by the way, but we're going to be looking at it. One way to view these circuits is you'll notice the polarity that's set up by this ground in this place. Notice there's a positive, negative, positive, negative, sometimes it's helpful to draw the battery in here. Notice the positive; let's put a DC battery here and then another DC battery here. Notice that the ground is connected to this side and then to this side here.
We have a positive going directly to this diode and the negative going directly to this diode. A transformer does not represent two DC sources, but sometimes it's easier to understand the current flow if we look at it in terms of the batteries. What we actual have is a … here we have our input waveform coming in, positive to negative, and sometimes it's helpful to view this. Remember that on this one actually this waveform is reversed and instead of going positive first notice it is negative. On this side, we could view the signal as going like this because here it's positive and here it is negative. The idea of this type of a device is that one diode will be on and the other will be off. If we look at the polarities of our battery it will make the current quite easy to understand.
Here the upper diode is going to be the conducting diode and you notice, remember that a polarity needs to be negative to positive across the diode in order for it to conduct from the cathode to anode. You notice you had the large positive signal here which would indicate this is probably going to be conducting. Notice on the bottom side you had a large negative, probably tell you this is probably going to be cut off. Let's look at it in terms of the battery. Notice this diode, if we start from there the current flows from negative to more positive. Let's look at the path, it would go negative to the ground and then it would go to the positive terminal. Effectively this diode sees negative to a more positive. This diode would be conducting. This one would see just the opposite. It would have the negative on this side, notice the negative polarity here, and the path for current coming up through here to the positive side. This would cut this diode off.
That is the positive alteration or the negative alteration just the exact opposite happens. We could flip this battery over and let's see if we draw it like this and we go like this. Then we connect ground and then like so. Now we are on, let's see the negative, we draw the sign wave like this and then there's the positive and going like so. Again, now things are reversed. Now on the positive is here. In fact, if we look at the battery, if we go from negative to ground, from negative to the positive side of this terminal this diode would be off and if we look at this one, now this one we've got the negative side of the battery here. If we go through the positive is here and this one will be cut off. What's the end result? On this one, we had the positive side will come in forward bias this diode on the positive cycle. Then on the negative part of the cycle, the lower was forward bias and we had another half-wave. This is constantly switching on every wave.
The diodes switch, if it's 60 cycles it's switching 60 times a second. Our end result is if we have an output that looks like this. Again its pulsating DC, but now we have twice as many pulses as we did before. In fact, if we wanted to backtrack this a bit, remember we said we had .318, well we're going to have twice that value with our full-wave rectification.
Bridge Rectifier
A bridge rectifier is more widely used than a center-tapped rectifier. Circuit operation is best understood by examining the current paths of the forward and reverse bias diodes during each half cycle of the input waveform. Again, we have the input AC coming in and we're going; in this case, the value of the full-wave is that you don't have to have the center-tapped transformer. You can just pout the entire secondary across this device. You'll be able to utilize the full secondary rather than just half of it. It's going to utilize two diodes bias one. There's a minor disadvantage here and that's since you're going through two diodes, instead of dropping .7 you'd dropped 1.4 volts, but that's a small consequence of being able to use the entire secondary of the transformer. Again, let's evaluate the paths for current and the respective diodes.
We have the AC coming in. Again if we draw the battery here, let's see what we have. Again in respect to the voltage source let's look at the diodes. Here we have negative and we're going to go over here for the negative and we're headed towards the more positive. Then from negative to a more positive and this is going to conduct. It would be one negative on this side, negative on this side, but the more positive on this side. These two would conduct. Now, on the other hand, let's look at these two diodes. This one has the positive is placed right here. Let's see, effectively the positive is only a .7 volt drop away and the negative is right here. These two diodes will be reversed bias and these two will conduct. That's going to be on the positive part of the waveform so we would have this result and output on the positive.
Now on the negative side again if we draw the battery like this and we take a look at this on the negative side. Again if we look at the diodes in relation to the battery if we go from the negative terminal through the diode, negative to a more positive. Put the negative there and then up through the ground and again we're going negative to the more positive terminal. These two diodes are forward biased. Again the negative is connected here and effectively the positive is connected here. In this case again, the positive is here and we're going to have a negative value here and these two are cut off. On the negative side, we will get another output. Now for practical purposes, we come in with an AC signal and we're going to get basically the same pattern that we had with the full-wave except that we're going to get greater amplitude. These are more widely used than the center-tapped variety.
Filter Networks
Most electronic applications require smooth DC current to operate properly. Filtering pulsating DC circuits accomplishes this. Adding the capacitor to the output of the half-wave rectifier filters the pulsating DC into smooth DC. Now what will happen is in the … This is basically the rectifier, remember we had an AC signal coming in and then our output looked like this. Now we have added a capacitor and the capacitor is adding what we're calling filtering. Now, remember the nature of a capacitor is it charges to a given voltage and then it will hold that charge for a period of time.
Now, in this case, I'm going to draw a little bit bigger picture of it down here, in this case, what is going to happen is that peak value is going to come in right here and it's going to charge this capacitor.
It'll charge to the peak value and then the capacitor will begin to discharge. It will begin to discharge until; again, another peak value comes in and recharges it. It recharges to the peak and then it begins to discharge and then another peak comes in charges it. You end up with an output that looks like in this drawing right here. The original signal would look like this and like this and like this and like this, but the result is something that looks like this. The value you're seeing here is a bit exaggerate. It can get quite smooth depending on the size of the capacitor and some service will utilize several capacitors, but this result in value. This value that's changing slightly is referred to as the ripple.
A Full-Wave Rectifier with a Filter
A capacitor filter added to the output of a full-wave rectifier is shown at the right. One drawback of the half-wave rectifier is the higher level of ripple voltage after filtering. Full-wave rectification reduces this voltage. What you'll have with a full-wave rectifier, remember that our output is going to look … Here I'll draw here. Remember with full-wave output we don't have any half-wave we just had one and then one and then one. With a full-wave, there is less time for this capacitor to discharge. Remember in a half-wave we charge to the peak value and then it has this much time to discharge. Now in a full-wave or a bridge, the time to discharge is half of that. What you end up with is a purer final output.
Other Types of Filtering
simply capacitor filters are adequate for many electronic applications and more critical applications more complex filter networks are required to reduce, or to eliminate, the ripple. There are a couple here that your text refers to. One is the L filter and another is the Pi filter. We might show the L is simply an inductor and then there is a capacitor. The Pi looks like a capacitor with an inductor and then a capacitor. I guess this looks like an upside down L and this resembles Pi, I guess. Those are a couple of other filters. We will not go into those, but simply to mention them. This set we've been looking at power supplies. We finished up looking at filtering and this is what ultimately makes our DC output. Remember we talked about our purpose was we started out with an AC signal and the desired result out was a smooth DC. We mentioned computers need 12 volts and maybe five volts and we want a smooth DC.
What we've shown here is that the DC might have little ripples in it, but modern power supplies have got some advanced circuitry that will virtually eliminate those ripples. This gives us a methodology to take our 120 volts AC in and rectify it, transform it, and make it into a low-level DC suitable for applications like computers. We looked at bridge rectifiers. We looked at full-wave rectifier. We looked at an application with a half-wave rectifier and half-wave rectification.