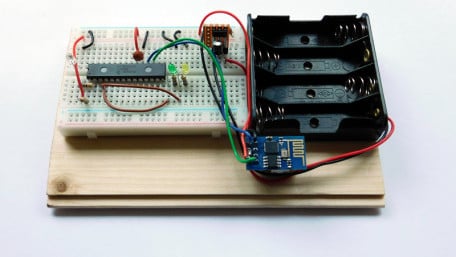
Using a custom framework (RIOT) to control an LED with a networked computer.
Using a custom framework (RIOT) to control an LED with a networked computer.

Learn how to listen to frequencies on the air with nothing more than a USB dongle: first FM radio, then voice signals.
Learn how to listen to frequencies on the air with nothing more than a USB dongle: first FM radio, then voice signals.

The Beaglebone Treat-Feeder is the prototype for a great pet-feeding device! Keep track of your pet's diet while you…
The Beaglebone Treat-Feeder is the prototype for a great pet-feeding device! Keep track of your pet's diet while you stuff your face!

LED ring flashes and lights can be a valuable tool for photographers. In this tutorial, we are going to build our own…
LED ring flashes and lights can be a valuable tool for photographers. In this tutorial, we are going to build our own ring light out of LEDs!

Tracking an infrared light source is not as difficult as you might think; a 14-pin PICAXE, a stepper motor with a driver…
Tracking an infrared light source is not as difficult as you might think; a 14-pin PICAXE, a stepper motor with a driver IC, three phototransistors, and a few other components will do the trick.

Use I2C on the Quark D2000 development board to interface a color sensor and get acquainted with using asynchronous mode.
Use I2C on the Quark D2000 development board to interface a color sensor and get acquainted with using asynchronous mode.

Get acquainted with using I2C with the Quark D2000 development board by interfacing an ambient light sensor and an LCD.
Get acquainted with using I2C with the Quark D2000 development board by interfacing an ambient light sensor and an LCD.

Need to ventilate a room? This article will show you how I made a relay-operated, GPS-timed fan to vent out the moist air…
Need to ventilate a room? This article will show you how I made a relay-operated, GPS-timed fan to vent out the moist air in my boat's cabin. It is controlled with a PIC16F628A and has an LCD.

This project gives you an example of how a basic user interface can be implemented using only one circular capacitive…
This project gives you an example of how a basic user interface can be implemented using only one circular capacitive touch sensor.

A PICAXE 08M2 can be used to read the amount of IR (infrared) light falling on a phototransistor and respond by moving a…
A PICAXE 08M2 can be used to read the amount of IR (infrared) light falling on a phototransistor and respond by moving a servo to a predetermined position.

The motion-activated Santa Cam is sure to catch who is stealing your milk and cookies this holiday season! You can even…
The motion-activated Santa Cam is sure to catch who is stealing your milk and cookies this holiday season! You can even use it for a photo booth this New Year's Eve!

In this project we will develop an algorithm for precisely locating a touch event that occurs somewhere on a circular…
In this project we will develop an algorithm for precisely locating a touch event that occurs somewhere on a circular capacitive sensor.

Learn how to build your own sous-vide machine. Say goodbye to overcooked steak!
Learn how to build your own sous-vide machine. Say goodbye to overcooked steak!

This project explores capacitive-touch-sense technology using an evaluation board for an EFM8 Sleepy Bee microcontroller.
This project explores capacitive-touch-sense technology using an evaluation board for an EFM8 Sleepy Bee microcontroller.

Nowhere to hide presents this holiday season? No problem! This alarm will sound anytime a loved one tries to get a sneak…
Nowhere to hide presents this holiday season? No problem! This alarm will sound anytime a loved one tries to get a sneak peek at his or her surprise.

In this short project article series, we will implement a simple PID controller using LabVIEW on a hobby DC servo motor…
In this short project article series, we will implement a simple PID controller using LabVIEW on a hobby DC servo motor and the NI myRIO.

Finally, we have everything we need for a functional robot. Let’s put the pieces together and see what the C-BISCUIT…
Finally, we have everything we need for a functional robot. Let’s put the pieces together and see what the C-BISCUIT demo bot can do.

The Zambroombi is the next step up from your neighbor's fancy Roomba. Set it and forget it!
The Zambroombi is the next step up from your neighbor's fancy Roomba. Set it and forget it!

Freeze moments in time to easily produce extraordinary close-up pictures with your digital camera, an Arduino, and these…
Freeze moments in time to easily produce extraordinary close-up pictures with your digital camera, an Arduino, and these simple circuits.

Create a tracking device with an HC-12 transceiver, a GPS module, an Arduino, and Google Maps.
Create a tracking device with an HC-12 transceiver, a GPS module, an Arduino, and Google Maps.


 Facebook
 Google
 GitHub
 Linkedin