This project brief provides the instructions for building a weight-sensitive LED lamp with an Arduino Uno and a handful of commercially available parts.
This project brief provides the instructions for building a weight-sensitive LED lamp with an Arduino Uno and a handful of commercially available parts.

Learn how to create a batteryless crawling robot using basic electronic components and a 3D-printed chassis.
Learn how to create a batteryless crawling robot using basic electronic components and a 3D-printed chassis.

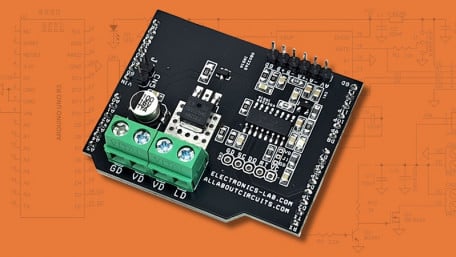
In this project article, we’ll create a programmable device that alerts users to changes in ambient light levels. Along…
In this project article, we’ll create a programmable device that alerts users to changes in ambient light levels. Along the way, we’ll learn about astable multivibrators and the Darlington pair.

Blending colors may sound elementary but it is vital in drawing attention to your project with RGB LEDs!
Blending colors may sound elementary but it is vital in drawing attention to your project with RGB LEDs!

Using a custom framework (RIOT) to control an LED with a networked computer.
Using a custom framework (RIOT) to control an LED with a networked computer.

LED ring flashes and lights can be a valuable tool for photographers. In this tutorial, we are going to build our own…
LED ring flashes and lights can be a valuable tool for photographers. In this tutorial, we are going to build our own ring light out of LEDs!

Tracking an infrared light source is not as difficult as you might think; a 14-pin PICAXE, a stepper motor with a driver…
Tracking an infrared light source is not as difficult as you might think; a 14-pin PICAXE, a stepper motor with a driver IC, three phototransistors, and a few other components will do the trick.

Freeze moments in time to easily produce extraordinary close-up pictures with your digital camera, an Arduino, and these…
Freeze moments in time to easily produce extraordinary close-up pictures with your digital camera, an Arduino, and these simple circuits.

In the final installment, we build our light-blade and assemble the electronics into the hilt.
In the final installment, we build our light-blade and assemble the electronics into the hilt.

In part 3, we compile the firmware and build the controller at the heart of the Saber, then do initial testing and diagnostics.
In part 3, we compile the firmware and build the controller at the heart of the Saber, then do initial testing and diagnostics.

In part 2 of the LED saber project, we'll assemble the power and audio systems.
In part 2 of the LED saber project, we'll assemble the power and audio systems.

The brightest blade in the world. Fluid sound effects generated in real time. Any colour, changeable on the fly. If you…
The brightest blade in the world. Fluid sound effects generated in real time. Any colour, changeable on the fly. If you want to know what it feels like to hold a Lightsaber, this project is the closest you can get today.

In this project, you'll learn how to build a 4-bit binary counter using a 5x7 LED matrix for data count value…
In this project, you'll learn how to build a 4-bit binary counter using a 5x7 LED matrix for data count value visualization. The project will use a combination of standard electronic and surface mount components.

Build a generator-powered LED headlight for a longboard for very cheap.
Build a generator-powered LED headlight for a longboard for very cheap.

Lasers are plentiful, inexpensive, and fun to use. Here's a target that reacts when it's hit by a laser beam.
Lasers are plentiful, inexpensive, and fun to use. Here's a target that reacts when it's hit by a laser beam.

Gather data via USB from a BH1745NUC optical sensor and then display color characteristics and illuminance values.
Gather data via USB from a BH1745NUC optical sensor and then display color characteristics and illuminance values.

Learn how to collect and process RGB data generated by the BH1745NUC color sensor IC.
Learn how to collect and process RGB data generated by the BH1745NUC color sensor IC.

Display colors by precisely controlling the intensity of red, green, and blue LEDs.
Display colors by precisely controlling the intensity of red, green, and blue LEDs.

Build an LED chaser with a little twist: we'll be using a microcontroller and an LCD along with the usual 4017 counters.
Build an LED chaser with a little twist: we'll be using a microcontroller and an LCD along with the usual 4017 counters.

In this project, you'll learn how to wire an LED and flash it using the Raspberry Pi. Also, to isolate the Raspberry Pi's…
In this project, you'll learn how to wire an LED and flash it using the Raspberry Pi. Also, to isolate the Raspberry Pi's + 3.3VDC compliant output pins from supply voltages greater than this power source, an opto-isolator will be introduced as well.
 Facebook
 Google
 GitHub
 Linkedin