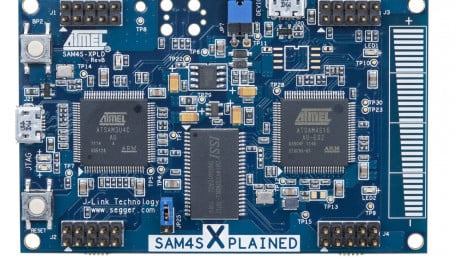
Part Three in this three-article series shows you how to generate values for a discrete sinusoid and continuously convert this data into an analog signal without…
Part Three in this three-article series shows you how to generate values for a discrete sinusoid and continuously convert this data into an analog signal without overburdening the CPU.

The mighty soldering iron. If you need one, want one, or just love to build stuff, then this project is for you.
The mighty soldering iron. If you need one, want one, or just love to build stuff, then this project is for you.

Part One in this three-article series focuses on using the SAM4S timer/counter peripheral to precisely control the…
Part One in this three-article series focuses on using the SAM4S timer/counter peripheral to precisely control the DAC’s sampling rate.

Learn how to communicate between your PC and the SAM4S using the Atmel Software Framework’s USB module and simple ASCII…
Learn how to communicate between your PC and the SAM4S using the Atmel Software Framework’s USB module and simple ASCII commands.

In this article we’ll use the SAM4S Xplained Pro development platform to get some hands-on experience with a PWM DAC.
In this article we’ll use the SAM4S Xplained Pro development platform to get some hands-on experience with a PWM DAC.

The new development board features a 32 MHz Quark and a host of features at a $14.95 price tag.
The new development board features a 32 MHz Quark and a host of features at a $14.95 price tag.

This article covers everything you need to know to generate pulse-width-modulated signals with Atmel’s SAM4S Xplained…
This article covers everything you need to know to generate pulse-width-modulated signals with Atmel’s SAM4S Xplained Pro development board.

This article provides additional details related to code development, hardware configuration, and the OLED interface.
This article provides additional details related to code development, hardware configuration, and the OLED interface.

Readers will learn how to wire a standard 16x2 LCD (liquid crystal display) to a Raspberry Pi to display messages.
Readers will learn how to wire a standard 16x2 LCD (liquid crystal display) to a Raspberry Pi to display messages.

No I2C interface with that sensor? No problem. Program a PIC chip as an I2C slave device for custom sensor and I/O…
No I2C interface with that sensor? No problem. Program a PIC chip as an I2C slave device for custom sensor and I/O interfacing. Here, we use three DHT22 sensors on a single I2C interface.

With USB communications and a Scilab graphical user interface, we can really see what the PID controller is doing.
With USB communications and a Scilab graphical user interface, we can really see what the PID controller is doing.

Lasers are plentiful, inexpensive, and fun to use. Here's a target that reacts when it's hit by a laser beam.
Lasers are plentiful, inexpensive, and fun to use. Here's a target that reacts when it's hit by a laser beam.

Learn how to read electrical signals and data from an analog device using the Step Response technique in Part 5 of the…
Learn how to read electrical signals and data from an analog device using the Step Response technique in Part 5 of the Building Raspberry Pi Controllers series.

This article covers the firmware that allows the EFM8 microcontroller to communicate with the DAC and the MAX31855.
This article covers the firmware that allows the EFM8 microcontroller to communicate with the DAC and the MAX31855.

Invoke the power of the PID (proportional–integral–derivative controller)! The key components in this design are an…
Invoke the power of the PID (proportional–integral–derivative controller)! The key components in this design are an EFM8 microcontroller, a DAC, and the MAX31855 thermocouple-to-digital converter.

In this article I'll show you one way to use a PIC microcontroller to get the time and date from a GPS module.
In this article I'll show you one way to use a PIC microcontroller to get the time and date from a GPS module.

Gather data via USB from a BH1745NUC optical sensor and then display color characteristics and illuminance values.
Gather data via USB from a BH1745NUC optical sensor and then display color characteristics and illuminance values.

Display colors by precisely controlling the intensity of red, green, and blue LEDs.
Display colors by precisely controlling the intensity of red, green, and blue LEDs.

In part 4 of this Build Raspberry Pi Controllers series, the reader will learn how to build an IR Remote Event counter…
In part 4 of this Build Raspberry Pi Controllers series, the reader will learn how to build an IR Remote Event counter using littleBits.

Tips and techniques for incorporating EFM8 microcontrollers into your custom hardware.
Tips and techniques for incorporating EFM8 microcontrollers into your custom hardware.


 Facebook
 Google
 GitHub
 Linkedin